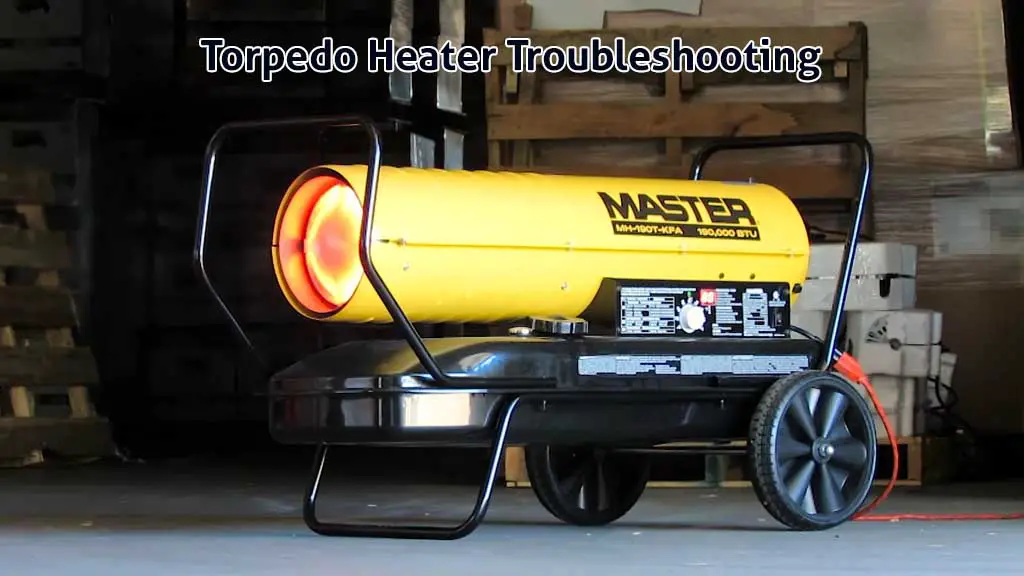
A torpedo heater is a great, inexpensive option to heat up your workplace. But it’s hard to be happy with them when they don’t work properly. In this Torpedo heater troubleshooting guide, I’ll discuss the main problems with torpedo heaters. They are:
- The torpedo heater doesn’t ignite at all.
- The heater ignites but shuts down after a while.
- The fan doesn’t turn when the heater is powered on.
- There is too much soot production.
- The heater isn’t turning on.
Don’t worry; I won’t just leave you high and dry by discussing the problems. I’ll also talk about how you can fix each of these problems in detail. So, let’s dive right in!
Torpedo Heater Troubleshooting [A Complete Guide]
It can be incredibly frustrating to go into your workplace and see that your torpedo heater isn’t firing properly. Especially when it’s cold and you really need the heater to work.
As annoying as it is, most torpedo heaters have some common problems. I’ll walk you through them along with their solutions in this forced air kerosene heater troubleshooting guide. However, keep in mind that these problems and fixes may vary depending on the brand and model of your torpedo heater.
01. Torpedo Heater Not Igniting
This is one of the worst problems you can face with your torpedo heater. There are many potential reasons behind it. So, let’s start with the common ones that are easy to fix and work our way from there.
First of all, the unit may be out of fuel. As basic as it sounds, a lot of people don’t even check the tank of their heaters and get frustrated. But without a fuel source, the heater can’t operate.
Then, the quality of the fuel also has an impact on how well the heater runs. If the type of fuel used is contaminated or has gone bad, the heater may not ignite. You can easily check it by looking inside the tank of your heater.
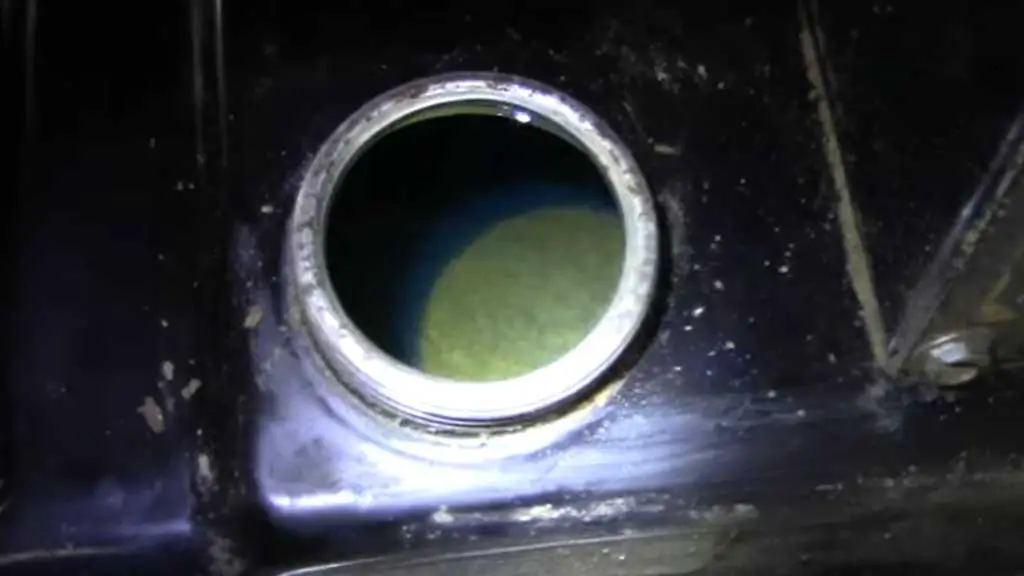
The main culprit is usually the collection of moisture in the tank. It mixes with the fuel and keeps the heater from turning on. The moisture usually collects at the bottom of the tank. The good news is that it’ll be clearly visible to you if you take a good look inside your tank.
Not plugging your unit into the right type of power supply can also keep it turning on. There are certain requirements in terms of what the power source should be like.
For example, in the case of Master torpedo heaters, they have to be connected to a three-pronged grounded power source. The extension cord should be at least 6 feet in length and have a minimum 14-gauge American wire rating.
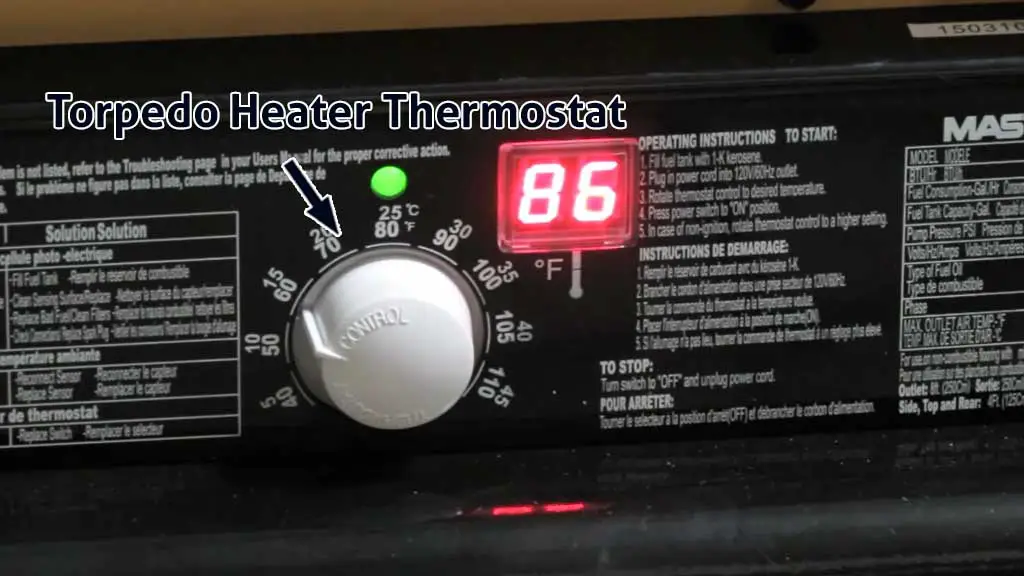
Another common but silly mistake that keeps the heater from igniting is not setting the thermostat high enough. If the temperature you set is not clearly higher than the current room temperature, the heater may not ignite.
Luckily, you can also tell easily if that’s the case. A common sign that this is the issue keeping your heater from igniting is that you won’t hear the fan of the heater turn on.
If these common issues don’t seem to be causing trouble in your case, you’ll have to inspect the unit further. The first step in doing that is to remove the cover of the unit.
In most torpedo heaters, there are screws on both sides of the heater holding the cover in place. You have to undo these screws to access the internal components of the heater.
You need to know how the heater works so that you can have a proper idea of which components may be faulty and need replacement. That’ll help you with the diagnostic process and guide you to the right step. So, let’s talk about that in detail.
How Does A Torpedo Heater Work?
The units that run on propane have their own air supplier. But most people use torpedo heaters that run on kerosene or diesel. These units have an air pump to regulate the air pressure of the unit. Under normal circumstances, the air pressure stays between 3-5 PSI.
The air gets pushed through a hose to the burning chamber at high velocity from there. It creates a vacuum and a negative atmospheric pressure in the fuel tank. This process draws fuel from the tank to the burning chamber.
Once you turn the heater on, the igniter gets activated and burns the air-fuel mixture. If anything goes wrong in this entire process, the heater won’t ignite. But if all that’s in check, the heater will ignite.
There’s also a safety device called a photocell, and its main job is to detect the flame. If it continues to detect the flame, the heater will work normally. However, if it can’t detect the flame, it shuts down the operation of the motor, and the air pump and the heater will no longer be ignited.
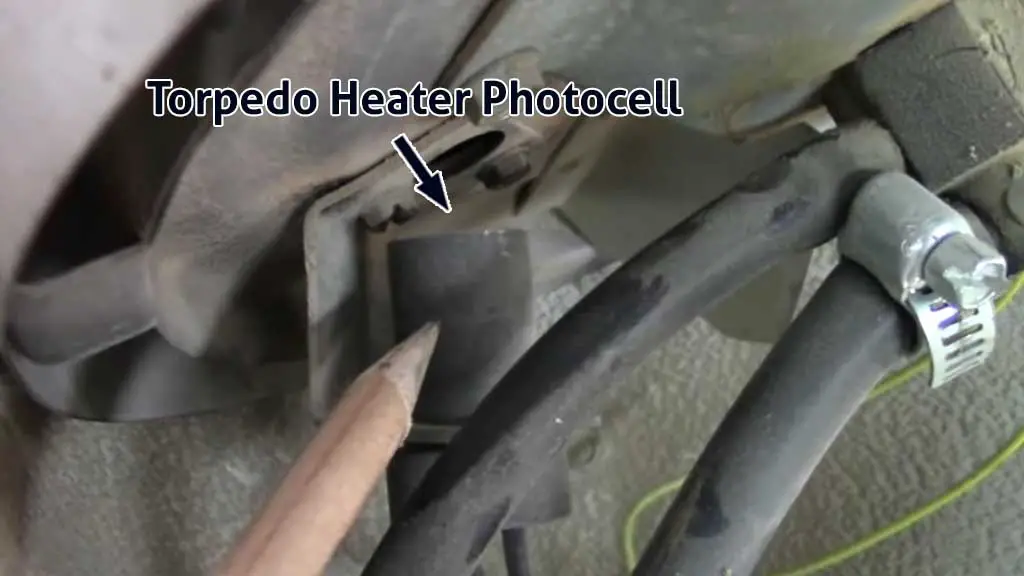
It does so because it doesn’t want unburned fuel and air to get out into the open. If that fuel were to go out, that’d be a major health risk and lead to all sorts of accidents. So, it’s a very important device.
Sometimes, the sensor in the photocell can be filled with dirt or debris. In that situation, it won’t be able to detect the flame. So, it will shut down the heater even if nothing is wrong with the fuel supply.
If any of the torpedo heater parts go bad, it can keep the heater from igniting. For example, there’s the air pump. There are air filters in the heater that can get damaged or clogged. If that’s the case, you won’t get the required amount of air and will fail to ignite.
Similarly, there are other things that can go wrong with the heater that can keep it from igniting. Here are some other most frequently seen reasons that make it happen:
- The pressure at the air pump is not at the right level.
- The fuel filter is dirty.
- The nozzle is dirty or obstructed.
- The ignitor is faulty and unable to create sparks.
Solution:
If your unit has run out of fuel, all you need to do is refill the tank, and you’re good to go. Make sure you’re using fuel that’s compatible with your heater. Otherwise, it may not work well for your heater.
If the fuel is contaminated, you have to clean the tank inside the heater. Then, you have to add fresh fuel to it. When you do that, the heater should run smoothly, and there should no longer be any trouble igniting it.
After checking the fuel, the next thing you should check is the power source. Make sure that they’re in alignment with the requirements of the manufacturer. If any of the things wanted by the manufacturer are out of place, you need to correct them.
If the fan is not turning on, you’ve probably not set the thermostat high enough. In that case, turn off the unit, set the temperature higher, and turn the unit back on.
Now, those were all the simple hacks that I wanted to share. If they solve the problem for you, that’s awesome. But since I don’t know what caused the issue in your case, let’s assume the problem isn’t solved.
Now, it’s time to do a bit more digging. Another common reason for the heater not igniting that I mentioned was a clogged air intake filter. Now, your only option is to replace the filter in that instance to fix the heater.
How To Replace A Torpedo Heater Air Intake Filter
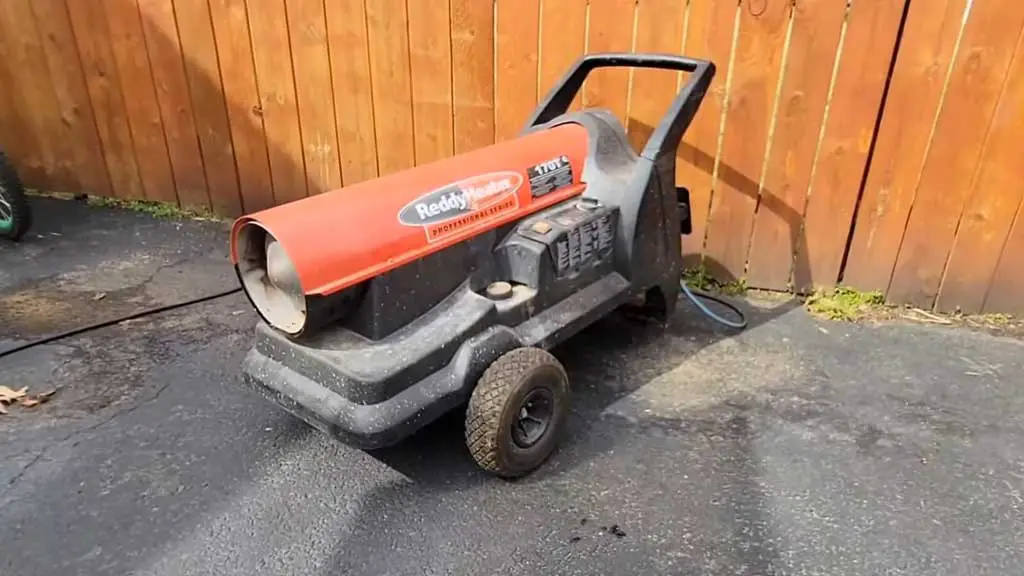
Depending on the brand and model of your unit, the process of replacing the air intake filter can vary. However, I’ve been using a Reddy heater for a while, and the air intake filter in that was clogged.
So, I had to replace it. The good thing is that I took notes on the replacement process, and I’ll show you how you can do it. Here’s a picture of the air intake filter in my heater:
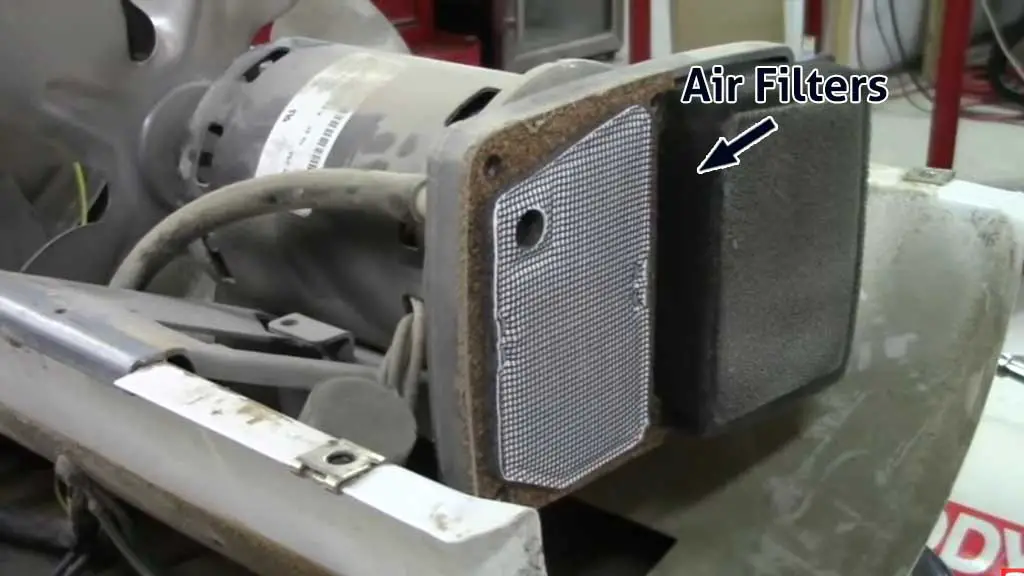
You can follow along if you have the same unit. Otherwise, you can follow the right instructions for your unit from the manual or online. Once you remove the outer cover of the heater, you should see the same thing as I’ve shown you in the picture.
From there on, it’s incredibly easy to remove the air intake filter, and I believe that anybody can do it. You can follow these steps to replace the air intake filter in your Reddy heater:
- Remove all the screws that hold the rear pump cover in place. Once you take out the screws, you’d be able to easily remove the pump cover.
- Once you remove it, you’ll have eyes on different air filters. Refer to the picture of the air filter I shared earlier to see what it looks like.
- The thicker filter on the right side is the air intake filter. Its job is to clean the air before it enters the pump. The one on the left is the discharge filter, which cleans the pressurized air going from the pump to the small manifold.
- Now, you need to replace the filter that you want. It’s super easy, as you’ll be able to pull it out the right way. You won’t have to take apart anything else.
- Put the new filter in place of the old one. Make sure the new filter has the right part number. If you do, there’ll be no problem replacing it.
- When that’s done, attach the rear pump back on and tighten the screws. That completes the filter replacement process.
How To Fix The Air Pressure At The Pump
The pump needs to have the air pressure that is required by your unit. You can find that number if you look at the date plate of your heater or your owner’s manual. You can also search for it online. The first thing you need to do is get the right pressure for your unit.
Once you know that, you need to measure the pressure of your air pump and see if that’s correct. You’ll need a low-pressure fuel gauge to check that. It’s usually really easy to measure the air pressure.
All you have to do is make sure that you’re getting the right gauge for your unit. The size of the port threads in most units for the pressure gauge is a standard quarter-inch pipe. But it can’t hurt to double-check it for your heater. Getting the wrong one can damage the port threads of your heater.
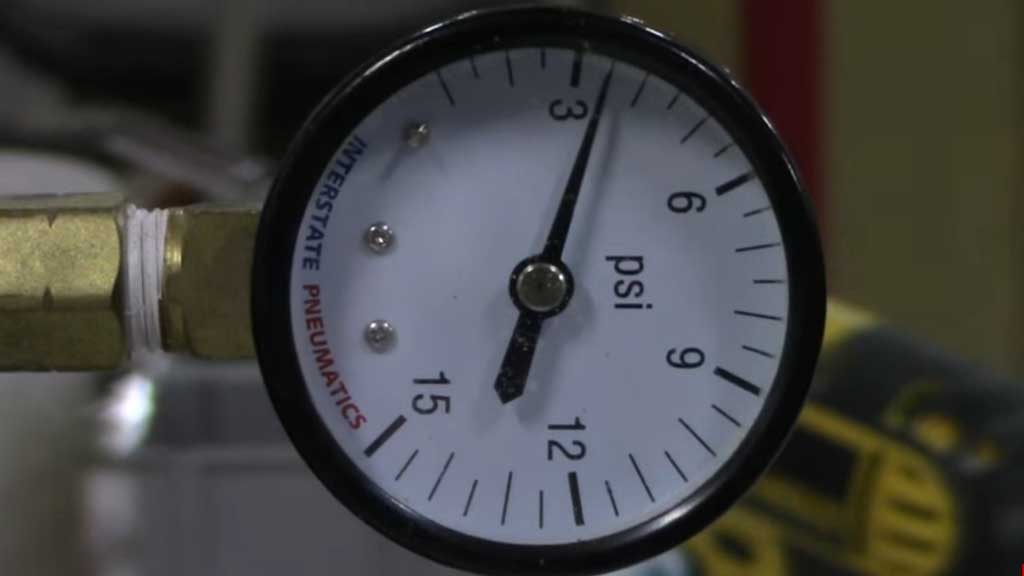
The gauges are normally pretty inexpensive, and you can get one for as little as $15–$20. If the pressure is not where it needs to be, you can readjust the pressure and solve the issue.
You need to find things in your heater—the pressure testing port and the pressure adjustment screw. They’ll both be located next to each other and in the entry area of the air pump.
First of all, remove the cover of the testing port and place the pressure gauge there. Then, start the heater and measure the pressure of the air. Then, get the pressure reading using the gauge.
If the pressure reading at the gauge doesn’t match the one on your heater’s data plate, you need to adjust it. In my unit, the adjustment screw is located on the right side of the testing port.
The adjustment screw has to be turned clockwise to increase the pressure. You have to do the exact opposite if you want to decrease the pressure. Based on the reading you get, adjust the screw accordingly. Hopefully, once you fix the torpedo heater’s air pressure, your heater will ignite.
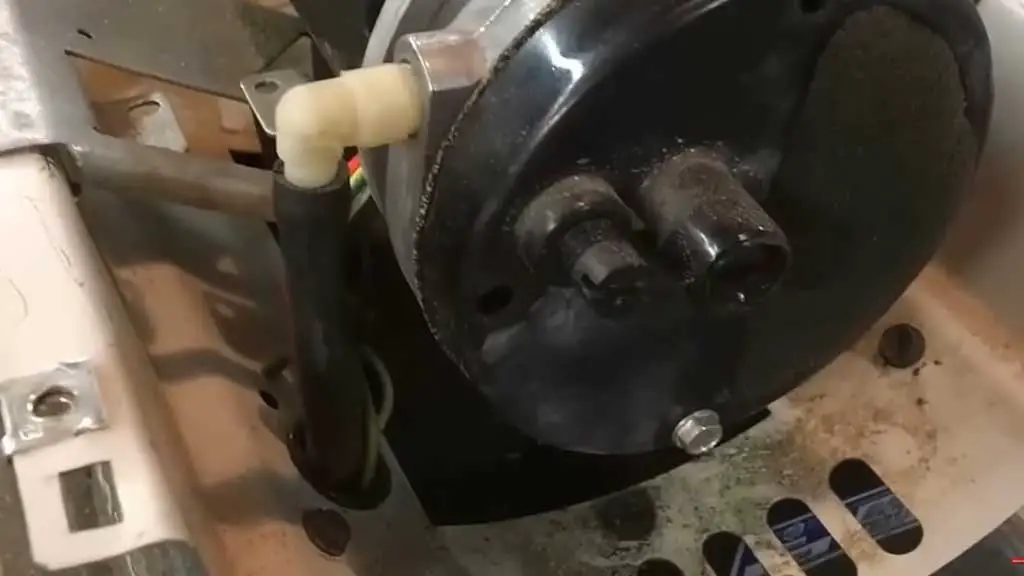
How To Fix A Dirty Fuel Filter
If the fuel filter is dirty, you need to clean it. It’s a common procedure for maintaining your heater, and you should know how to do it. Here, you can follow these steps to clean your heater’s fuel filter:
- Undo the screws holding the cover of the heater in place, and then remove the outer cover.
- Disconnect the upper fuel line from the fuel filter neck.
- You’ll be able to pull the fuel filter then. Be gentle when you pull the bushing, fuel filter, and lower fuel line.
- Isolate the fuel filter and clean it. You need to use clean fuel to clean it and get the contaminated fuel out.
- Restore the connection to the fuel line and attach the outer cover of the heater.
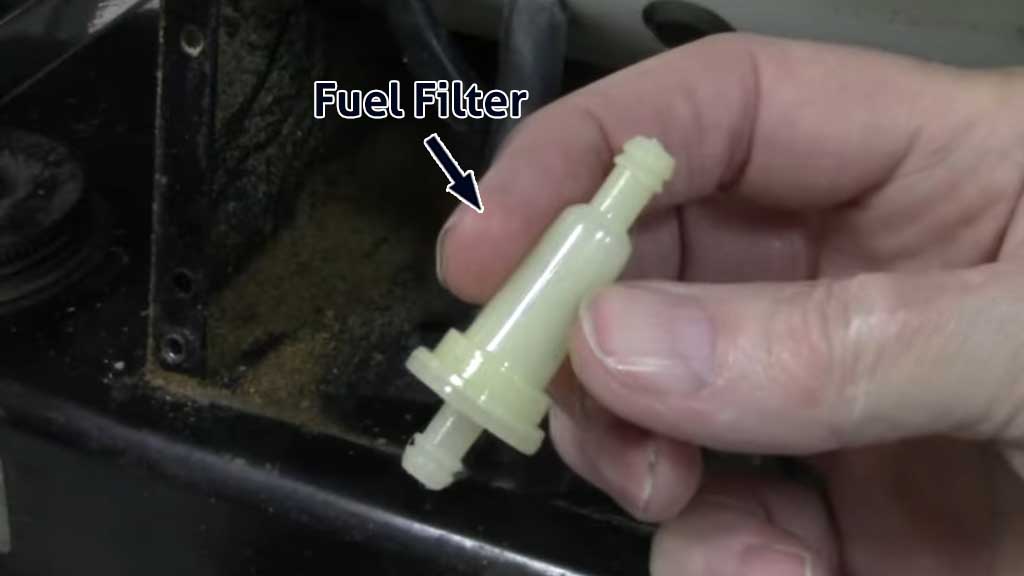
That’s how easy it is to clean the fuel filter. If your heater is old and you’ve had the same fuel filter for over 10 years, it’s not a bad idea to replace it altogether. Make sure you order the right part number, and you’ll be able to replace it without any issues.
How To Solve A Dirty Nozzle Problem
If the nozzle is dirty, you have to clean the nozzle. The way to do it is by blowing compressed air through it. However, the problem is that getting access to it is not easy at all.
You’d have to remove the upper shell, fan, and fuel lines to get access to the nozzle assembly. Then, you’d have to remove the nozzle, blow compressed air, and put it back in.
While you’re at it, check the nozzle for damage. If the nozzle shows serious signs of damage, you’re better off replacing it. But if it just seems to be dirty, then cleaning it with compressed air should do the trick.
After doing that, reconnect it to the heater and reassemble the parts you took down previously. Hopefully, your torpedo heater will ignite now.
How To Deal With A Bad Ignitor In Your Torpedo Heater
If the ignitor won’t fire, the heater won’t ignite. Unfortunately, you can’t fix a bad ignitor. So, your only option is to replace it. Don’t worry, I’ve done it many times in my life and I can walk you through the steps to do it. Here they are:
Step 01 – Disconnect The Ignition Wires
First of all, you’d have to remove the outer cover of the heater. Then, you’ll have to take out the fan. Use a 1/8″ Allen wrench to remove the screw that holds the fan to the motor shaft to make it loose. Pull the fan from the motor shaft and slip it out.
Remove the screws that hold the side cover of the heater in place. The ignitor will then come loose and you’ll be able to pull it out. Disconnect the ignitor wires from the ignitor assembly.
Step 02 – Remove The Old Igniter
Locate the hole in the lower shell and pull the ignitor wires through it. Remove the fuel line hose and the air line hose from the heater. Take out the photocell from the photocell bracket.
Remove the combustion chamber of the heater. Then, you have to remove the ignitor screw that holds the ignitor in place. Once you do that, you’ll be able to pull the ignitor from the nozzle bracket. Make sure you remain gentle when you do that.
Step 03 – Install The New Ignitor
Place the new ignitor in place of the old one. Make sure you don’t strike the ignitor element while you do it and tighten the ignitor screw. From there on, it’s a process of reverse-engineering the previous steps.
Route the ignitor wires to the correct spot and place the side cover of the heater back. Restore the connection of the fuel line and the airline hose to the nozzle adapter assembly.
Put the photocell back in place. If the photocell is dirty, it’s not a bad idea to clean it gently with sandpaper. The same goes for the fan. You can clean it with a soft cloth before you put it back in. Place the outer shell of the heater back in place and you’re all done with the replacement process.
So, that’s how you can solve the issue of your forced air heater not igniting, according to me. If you don’t even hear the motor start, the issue is most likely something simple. It could be power issues or simply not setting the thermostat too high. The motor can also be faulty and you’d have to replace it then.
If the motor starts but the heater still doesn’t ignite, that’s usually due to bad fuel, no fuel, obstructions in the nozzle, defective igniter, and so on. You already know how to fix these issues.
There’s a very low probability that you’ll still be facing this issue after you’ve gone through the fixes I suggested. However, if the problem still remains, then it’s something unique and you need to get it checked by a qualified technician. He’ll be able to guide you toward the right solution.
02. Heater Ignites But Shuts Down
Another common problem that many forced air heater owners face is that the heater ignites but shuts down for a while. So, let’s look at the reasons why your torpedo heater shuts off after several minutes along with the solutions.
The good news is that a lot of the reasons why the heater won’t ignite at all are also applicable here. In many torpedo heaters, the error code E1 also comes up when this issue occurs. The most common reasons behind this are:
- The pump pressure isn’t correct.
- The air intake, air output, or lint filter is dirty.
- The fuel filter is dirty.
- There is dirt in the nozzle.
- The ignition or the ignition control assembly is faulty.
- The photocell lens is dirty, or the photocell isn’t placed properly. The photocell being defective would also cause this issue.
- The electrical connection between the photocell and the main PCB has gone bad.
Solution:
I’ve talked about the fixes to the first five problems in detail in the last section. If the pump pressure isn’t right, you need to measure it with a gauge and adjust the screw to set it correctly. If the air filters are dirty, you need to replace them.
The fuel filter can be cleaned with fresh fuel. If there’s dirt in the nozzle, blowing compressed air through it will clean it up. If the igniter is defective, you need to replace it. Again, you can find detailed instructions on solving these issues in the previous section on why the heater won’t ignite.
However, one problem that I haven’t yet addressed in detail is what to do if there are issues with the photocell. Truth be told, it’s the most common reason why the heater shuts down after it ignites.
If you remember from the section on how torpedo heaters work, I told you that the job of the photocell is to sense the flame. If it can’t detect the flame, it signals the PCB to shut off the heater. So, let’s see how you can fix this.
How To Deal With Photocell Issues In The Torpedo Heater
There are a few possible problems that you can face with the photocell that make the heater shut off after a while. The most common one is that the lens of the photocell is dirty.
In that case, you can clean it with sandpaper or a soft cloth, and that’ll solve the issue. It’s not very hard to access the photocell. You’d have to remove the outer cover of the heater and the fan to access the photocell mount.

Once you see the photocell mount, you can remove the photocell from there. You don’t have to completely remove the photocell if you only want to clean it. Unmounting it is going to be enough.
If the photocell is not adjusted properly, that can also cause this issue. So, make sure you adjust its position so that it can easily detect the flame of the heater. If that’s in order, you also need to check the wiring of the photocell.
If the wiring between the photocell and the PCB is damaged, it can also cause the E1 error code. In that case, you’d have to inspect the wiring. Refer to the wiring diagram in your owner’s manual.
You’ll find detailed instructions there on how to check the wiring. If there’s any fault there, you need to fix it. If the wiring is damaged, you can replace it. Finally, there’s the possibility that the photocell is defective. In that case, you’ll have to replace it.
If you’ve already gotten to the steps to clean it, you can follow these remaining steps to replace the photocell in your torpedo heater:
- Remove the screws on the side cover of your heater.
- Remove the connection to the power switch, and you’ll be able to remove the side cover.
- Disconnect the wiring connection of the photocell from the circuit board to completely isolate it from the heater.
- Remove the old photocell and put the new one in its place. Then, connect it to the circuit board wiring.
- Put the side cover back in place and tighten it with the screw. Connect the fan and the outer cover to the heater.
That’s how you can replace the photocell in a torpedo heater. Remember that I talked about steps that are universal in most torpedo heaters. However, the process can vary a little bit based on the model of your torpedo heater. In that case, check your owner’s manual for more instructions.
03. The Fan Doesn’t Operate When The Heater Is On
If the heater is turned on, sometimes you may face the issue that the fan won’t turn. The error code E1 or E2 can pop up in some torpedo heaters during this problem. It’s a common issue, but thankfully, the problem is easy to solve in most cases. Here are the major reasons behind it:
- The thermostat is set too low.
- The connection between the motor and the PCB is bad.
- The fan motor is defective.
Solution:
If the thermostat is set lower than the room temperature, the fan won’t start. So, you’d have to set the thermostat to a higher setting. Turn on the thermostat and set it to a temperature at least 10 degrees higher than your previous setting and see if that solves the issue.
Secondly, you need to check the electrical connections in your heater. If you find any fault there, replace the faulty wiring, and that’ll fix the issue. If it’s not something you can do on your own, consult a trained electrician to help you out with this issue.
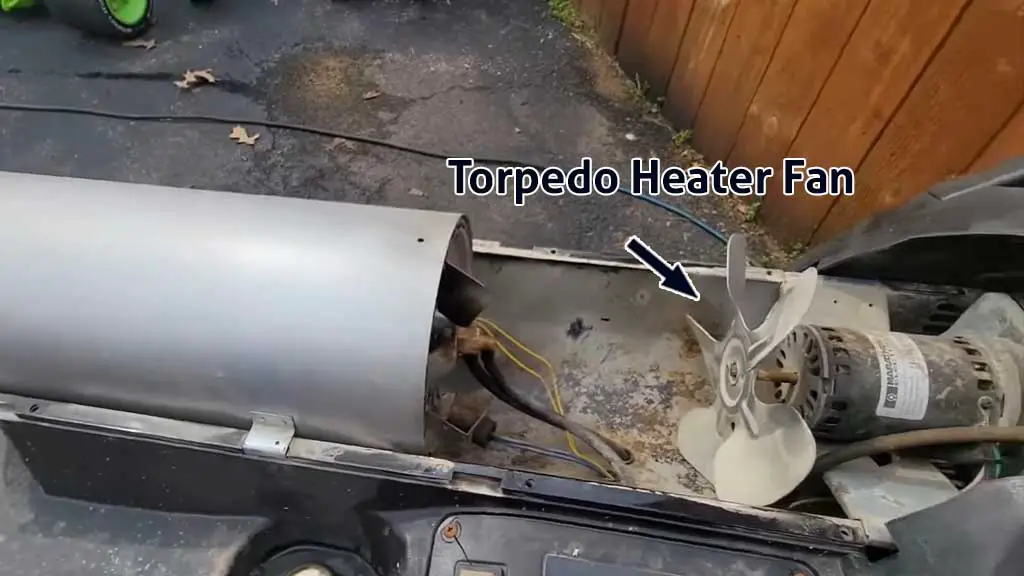
Finally, there’s the possibility that the fan motor itself has gone bad. It’s rare but it can happen at times. Especially, if you’ve been using the heater for a while now. If the fan is faulty, you’d have to replace it with a new one.
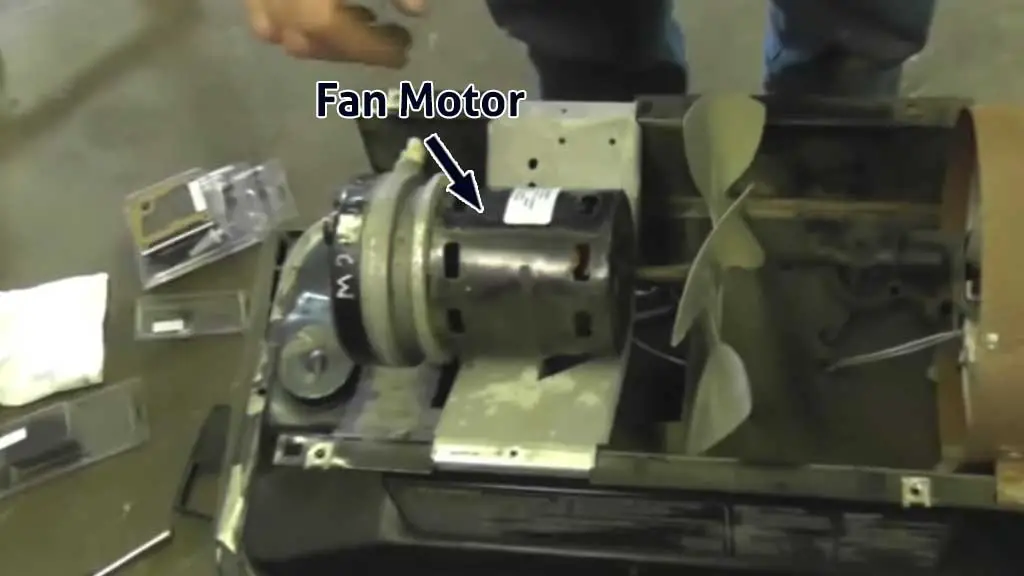
Replacing the fan is generally an easy job, as you should have access to it right away when you remove the outer cover of the heater. Once you replace it, the error code should go away, and the fan should operate smoothly.
o4. Excessive Soot Production
If your heater burns clean, there will be a very bright red flame around the edges. The color inside the circle should be just a little bit darker. That’s how you can tell you have a good flame.
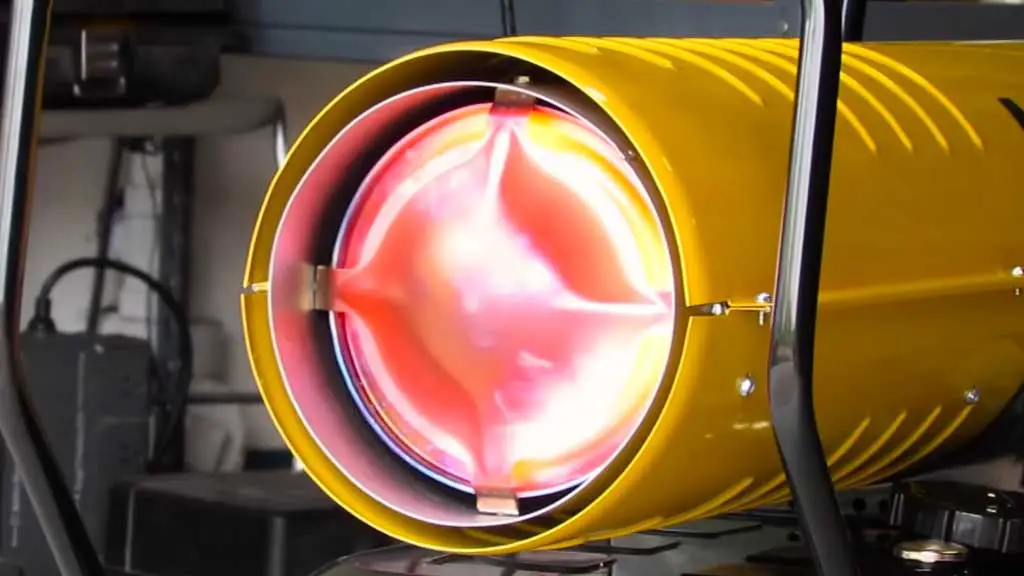
So, if the flame in your heater doesn’t look like that and produces excessive soot, that’s definitely something you shouldn’t ignore. If you leave it unchecked over a long period of time, it can lead to a much bigger issue.
The most common reason behind getting a lot of soot or poor combustion is not using fuel of good quality. If there’s moisture in the fuel or you’re using something that’s not recommended by your manufacturer, you may be facing this issue. Besides that, it can also happen for the following reasons:
- The fuel filter is dirty.
- The air intake, output, or lint filter is clogged.
- The pressure of the pump is either too high or too low.
Solution:
If you’re using fuel of low quality or fuel that’s been contaminated, you need to dump it from your heater right away. Once you do that, clean the tank with a large wire brush. Then, you can put fresh fuel inside it.
To solve this problem for good and not reappear, always follow the guidelines of your manufacturer in terms of the fuel you should use. They’re the ones who made the devices and they aren’t going to misguide you on how to use them.
As for the rest of the possible problems behind this issue, I’ve already explained how you can solve them in the earlier sections. You’d have to replace or clean the dirty filters.
When it comes to the pressure, you’d have to measure it with a gauge. Then, increase or decrease it and get it to the right settings. Hopefully, implementing these solutions will lead to a cleaner flame that won’t produce as much soot.
05. The Heater Is Not Turning On
It’s one thing for the heater to not ignite, but to not turn on at all is another problem that many people face. The most obvious and simple reason behind it is that it does not have electric power.
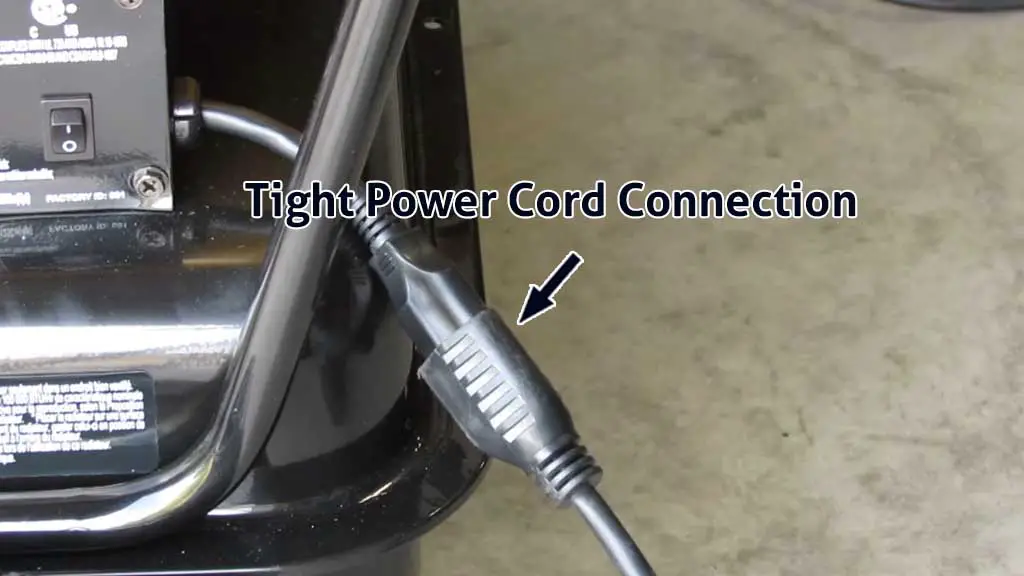
If you’re using a generator as your power source, make sure it has enough fuel and is working properly so that it can support the operation of the heater. Check the electrical connections and double-check that everything is connected tightly. The fuse in the power supply can also be blown, causing this issue.
So, test the power supply as well as the different power cord connections. If everything is in order and running as it should, then you can rule out power-related issues.
The other common scenario behind this issue is due to the temperature limit sensor. If it makes a bad connection with the PCB or has overheated, it can keep the heater from turning on.
Solution:
If the issue is related to the power supply, you can easily fix it. The solution will vary depending on the problem you’re facing. For example, if the generator is your power source and it has run out of fuel, you’ll have to replenish it.
If the fuse in the power supply is blown, you have to restore it and most likely replace the power supply as well. If the power cords haven’t been connected tightly, fix them and see if that solves the issue.
If the temperature limit sensor has overheated, you have to wait for it to cool down. You can do it by turning off the power heater and unplugging it from the power source. Give the heater at least 10 minutes to cool down, and then you can restart the heater.
Hopefully, that’ll fix the issue and your heater will turn on. If not, you need to check the electrical connections and see if the sensor is making a connection with the PCB. If not, replace the wiring to solve the issue.
If the heater still won’t run after you’ve tried out these solutions, you’ve done everything you could do on your own. Now, it’s time to bring in an expert and use his guidance to solve the problem and turn your heater on.
How To Prevent Problems In Your Torpedo Heater
Torpedo heaters are a great option to keep yourself warm in cold weather. As they’re reasonably portable, you can use them to warm up your workplace. Besides the troubleshooting process, you also need to know about what type of practices you should follow if you want to use your heater for a long time.
i) Adding Fuel The Right Way
Fill the tank with fresh kerosene to make it ready for heating. Kerosene is the common fuel source in these types of heaters. It’s also okay to fill them with number 1 or number 2 diesel fuel.
The main thing to keep in mind is that you should fill the heater in an area that’s well-ventilated. Besides that, the heater should also be completely level when you fill up the tank. You can continue to fill the heater with fuel until the gauge gets to the letter “F”.
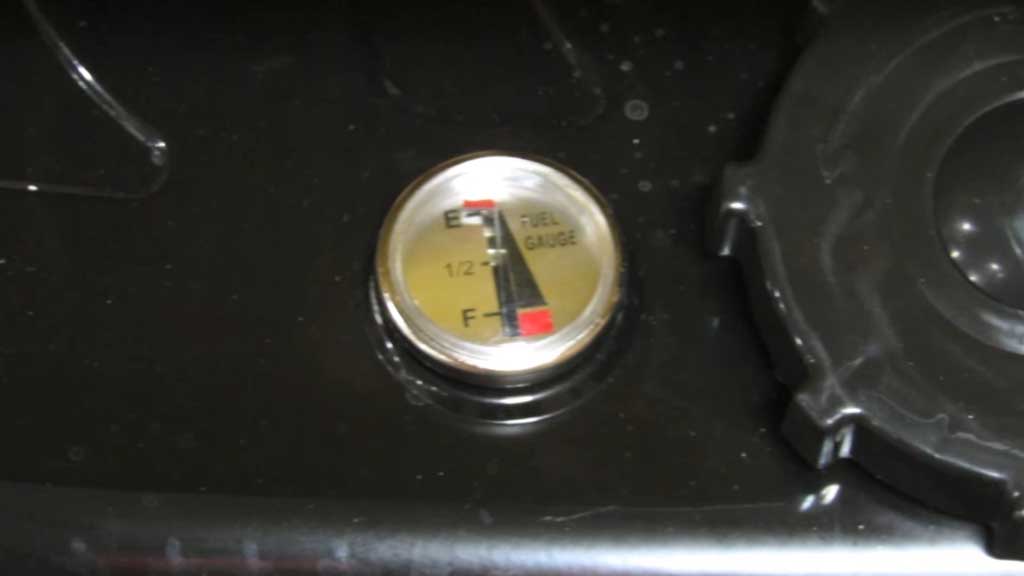
After you’re done filling the heater with fuel, make sure that you place the fuel cap back on securely. Otherwise, fuel can leak from there when you move the heater around. Then, you can take the heater to your desired location and enjoy the hot air coming from it.
ii) Ensuring Proper Ventilation
I can’t stress enough how important ventilation is for your heater. Even when you get a place where you want to use your heater, keep it in a place where it gets sufficient air. Keeping it in the corner of a room where it gets covered up with other things is the number one way to make the heater go bad.
On top of that, you could also be the victim of a serious accident if the workplace isn’t well-ventilated. That’s because, as humans, we can only tolerate a low level of carbon monoxide.
When there’s proper ventilation, enough oxygen will come in and the carbon monoxide will also have room to go away. Otherwise, it can cause serious issues. Especially in people who have issues with breathing. I recommend that such people shouldn’t use a heater that works on this mechanism.
Doing so over a long period of time would also damage the heater. Placing it in a corner on one side is also not the ideal way to achieve efficient heating across the entire area you want to cover. As simple as it sounds, making sure that your heater has a proper air supply isn’t something that you should overlook.
iii) Power Interruptions In Heater
It’s understandable that you’d have to leave the room at times while the heater is connected to a power outlet. If you want to go for a decent period of time, it’s a good practice to always turn the heater off. Generally speaking, most people I know follow this rule and that’s good.
However, where a lot of people make a mistake is turning the heater back on. When they return to their workspace, they just plug in the power cord and turn on the heater right away.
But that’s not the right thing to do. You should turn the power supply to the heater back on. Then, wait for at least 15–20 seconds before you turn the power back on.
These little things will make sure that your heater doesn’t go bad soon and lasts a long time. If you ignore these basics, you could face problems with the heater and may have to do some electric torpedo heater troubleshooting to solve these issues and use your heater again.
iv) Avoid Flammable Objects
Just because the heating is done inside the firebox of the torpedo heater, don’t make the mistake of thinking that it’s weak. The heat produced by such torpedo heaters has a very high velocity. Keep in mind that you’re dealing with open flame when it comes to torpedo heaters.
If you’re a painter, then you need to consider that maybe torpedo heaters aren’t the right option for you. That’s because paint fumes are highly flammable. If they come into contact with the flame of your torpedo heater, good luck cleaning that mess up.
Depending on the brand of torpedo heater you’re using, the instructions may vary in terms of how much clearance the heater requires. For example, in Master Torpedo heaters, 8 feet from the front and 4 feet from the other sides are required.
v) Replace Components At The Right Time
If you take care of each of the parts in your heater separately, your heater will have a much easier time performing at its optimal level. Maintaining the parts involves cleaning them and replacing them at the right intervals.
I’ve compiled a guideline for you that you can follow to take better care of the different parts of your torpedo heater. Here they are:
- It’s a good idea to flush the fuel tank after every 200 hours of operation of the heater.
- Replace the air intake, outlet, and lint filters after every 500 hours of use of the heater.
- The fuel filter of the heater should be cleaned at least twice in every heating season. Depending on your use, the right frequency may be even higher.
- Check the fan blades before the start of every heating season and clean them if needed. Do it one more time in the middle of the season as well.
Mr Heater Propane Torpedo Heater Troubleshooting Guideline
I’ve talked about troubleshooting problems that are pretty much universal for all torpedo or forced air heaters. The majority of them run on kerosene or diesel. However, you can also face issues with your propane heater.
The heater not igniting or lighting up at all is also a common issue in propane torpedo heaters. Since a lot of people go for the Mr. Heater propane torpedo heater and I also used it in the past, I’ll specifically talk about it in this section along with the fixes.
If the heater doesn’t ignite and there’s no spark at all, it means the igniter or the ignition module is faulty. To know which one is bad, you’d have to do a little test. First, you have to remove the fan from the heater and access the rear side of the igniter.
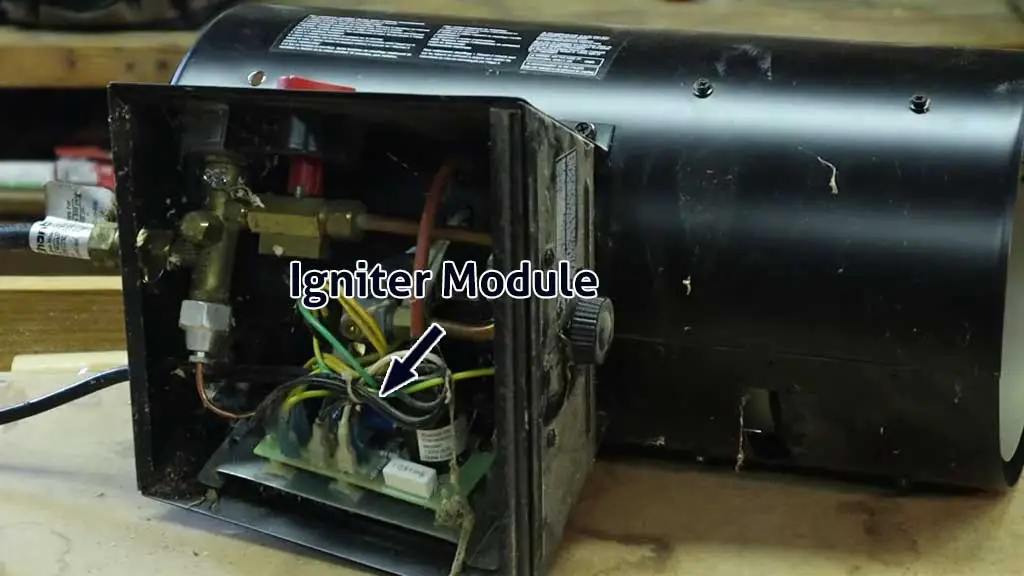
You’ll see a red cord there. You’re going to have to pull it out and check out its amperage. If you don’t see any voltage reading coming from it, the ignition module is bad. If you do see a good voltage reading, then the igniter itself is faulty, not the module.
Now, depending on which part is faulty, you’d have to replace it with a new one. Make sure you order the right part number for your unit so that the replacement job can go smoothly. Once you do that, the heater should ignite properly, and your problem will be solved.
FAQs:
Is it okay to leave the torpedo heater unattended?
It’s never a good idea to leave a torpedo heater when it’s connected to a power source. If you need to leave the room while the heater is still in use, you need to turn off its power.
Are torpedo heaters worth it?
Yes, forced air heaters are often considered a great option for many reasons. They’re fast, relatively inexpensive, and run on common types of fuel. They’re also portable, to some degree.
Should I use gasoline in my torpedo heaters?
No, gasoline is highly volatile, and it isn’t the right fuel choice for gasoline heaters. In fact, you should only use the type of fuel recommended by the manufacturer of your torpedo heater.
Are torpedo heaters always the right choice?
While torpedo heaters are great for temporary use, I don’t recommend them for long-term use. They are dependable when they’re fed proper fuel. But if you want to use a heater for a long time, they’re not the most energy-efficient.
Conclusion
Now you know how to diagnose the problems with your torpedo heater and implement the fixes. Hopefully, you’ll find this torpedo heater troubleshooting guide useful and actually be able to solve your problem.
If the heater doesn’t ignite at all, it’ll require a lot of patience, as there are many potential causes. So, you’ll have to diagnose them one by one until you get to the root problem and solve it. If you have any questions or you’re facing any other issue with your heater, leave a comment below.