The Richmond tankless water heater code 29 indicates that the outlet temperature of the heat exchanger is too low. The most common reason behind it is a clogged neutralizer.
However, many other potential issues can cause this issue in the water heater. Some of them are:
- Dirty Heat Exchanger.
- Faulty Thermistor.
- Defective PCB.
- Blocked Air Intake.
Keep reading this guide to find out more about each of these problems and learn how to fix them in detail. Let’s dive in!
Richmond Tankless Water Heater Code 29 [Reasons + Solutions]
We’ll look at all the primary reasons behind getting the error code 29 in your Richmond water heater and their fixes in this section.
Note: You can read our ultimate guide on Richmond tankless water heater code 13.
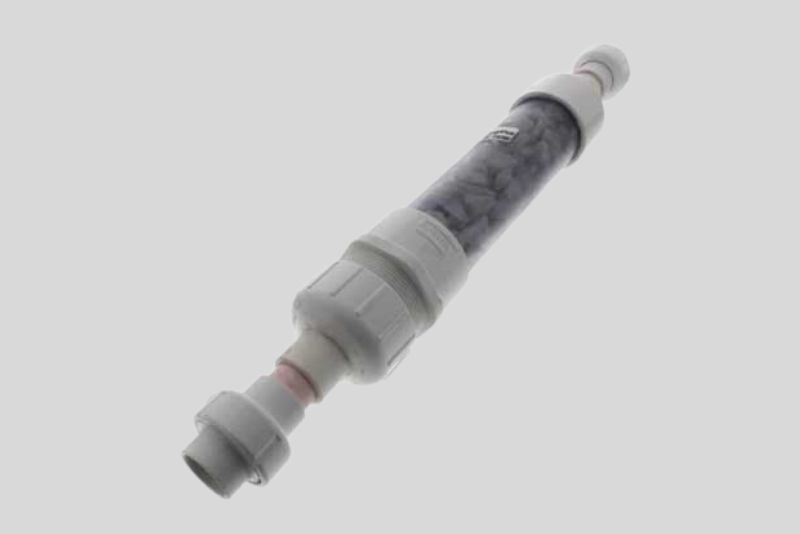
1. Clogged Neutralizer
There is a condensate drain in your Richmond encore tankless water heater that helps remove the harmful condensate from the heater. As condensate is acidic in nature, it’s important for it to be removed. Otherwise, it can freeze on the exterior walls in cold weather.
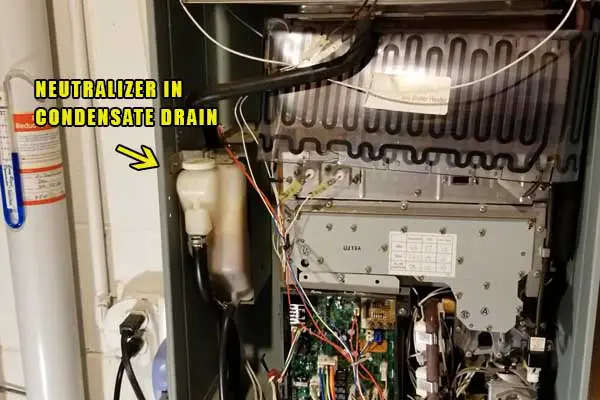
The neutralizer helps the condensate drain in doing its job. CaCO3 (calcium carbonate) is present in the neutralizer. As it filters the minerals, the neutralizer can get clogged over time.
When the neutralizer gets clogged, it can restrict the flow of water. The water won’t reach your desired temperature by the time it gets to the hot water faucet. You can end up with the error code 29 in such situations.
Solution:
If the neutralizer in your heater is clogged, the first thing you can try is to clean it. You’ll have to take it out from the heater to do that. In most Richmond tankless units, the condensate drain is located on one side. You’ll find the neutralizer in that area.
Once you take the neutralizer out, you can inspect its condition. Clean it and see if that works. Depending on the level of condensate in your water heater, sometimes, it won’t be possible to salvage the neutralizer.
You’ll have to replace the neutralizer in such cases. Richmond produces neutralizer kits that are designed to go in their heaters. You can use them. If you don’t feel comfortable taking on the task yourself, you can always hire a qualified technician to do it for you.
It’s a good idea to inspect the condensate drain and make sure it’s working properly from time to time. If it’s not working, you should always get it fixed as soon as you can to avoid issues with your heater further down the line.
2. Dirty Heat Exchanger
The heat exchanger is the heart of any tankless water heater as it does the main job of heating the water in a short time. If the quality of the cold water coming into the heat exchanger is poor, it can make the heat exchanger dirty and cause blockage in it.
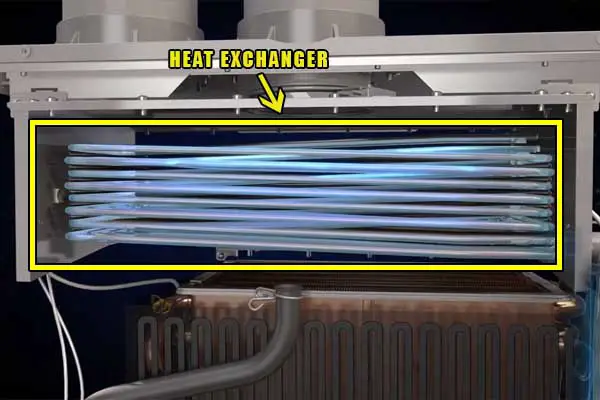
There is a cold water inlet filter in Richmond tankless water heaters that reduces the minerals going into the heat exchanger. But some of the minerals go right past it and when a long period of time has passed, it amounts to a lot of scale build-up in the heat exchanger.
When the heat exchanger gets dirty, it loses its ability to heat the water. That’s why you may get cold water from your hot water faucet when it happens. This issue normally leads to error code 29 or error code 88.
Solution:
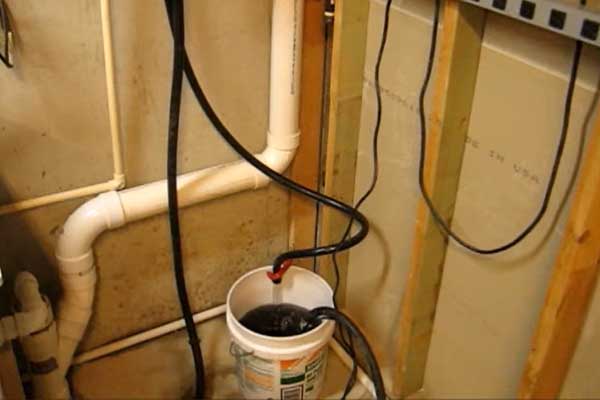
If the build-up of minerals is affecting your heater exchanger, you need to flush it to solve this issue. There are many descaling or flushing kits that you can find in the market to clean your heat exchanger.
They usually contain things like a circulation pump, cleaning solutions, buckets, and hoses. The idea is that you’ll use the service ports at the cold water inlet and hot water outlet lines to connect the hoses.
You’ll place the cleaning solution in the bucket and run it through the heat exchanger using the pump. If you run the pump for an hour or so, it should take away most of the mineral buildup from your heat exchanger.
Descaling the heat exchanger is an easy job. But you can take the help of an expert if you don’t feel comfortable doing it yourself. Once you clean the heat exchanger and reset your tankless water heater, the error code 29 should go away.
3. Faulty Thermistor
Your Richmond tankless water heater has a thermistor that measures the temperature of the heat exchanger. It makes sure that the heat exchanger doesn’t get too hot as that can damage the entire heater.
Unfortunately, thermistors are prone to failing. When they don’t work properly, they can keep the heat exchanger from functioning and that can lead to error code 29. The good news is that you can easily check if your thermistor is at fault. Get a multimer and set it to read the resistance in Ohms.
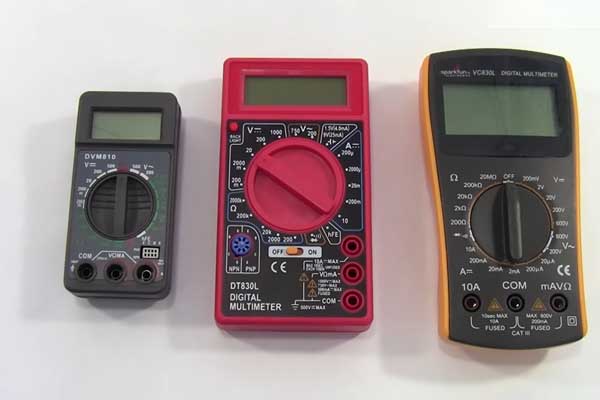
Connect the multimeter leads to the black and yellow wires. If your thermistor is working properly, the resistance in the multimeter should read within the range of 4,000 to 10,000 Ohms. If it’s out of that range, you can conclude that you have a bad thermistor.
Solution:
There’s not much you can do about a bad thermistor except to replace it. Once you replace the faulty thermistor, the error code should disappear and your heater should work fine.
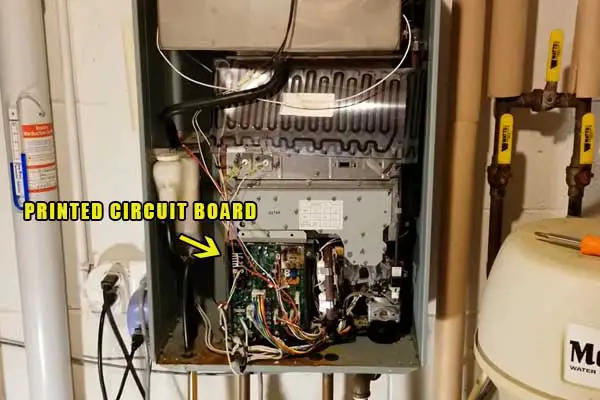
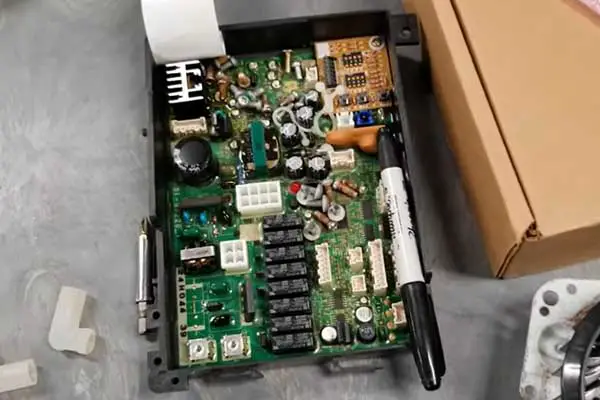
4. Defective PCB
Another common reason behind your Richmond tankless water heater showing error code 29 is a defective Printed Circuit Board. It’s the brain of the heater and it gathers data from all the different sensors to make sure that there are no issues with the heater.
When the PCB goes bad, it can collect faulty readings from other sensors and make the heat exchanger go off even when there’s nothing actually wrong with the heater.
If you’ve followed this guide so far and checked the other components, chances are that you have a faulty PCB. If you’ve checked the thermistor with a multimeter and it is within the normal operating range, there’s a strong likelihood that you have a bad PCB.
Solution:
You need to replace the PCB to get rid of the error code when it goes bad. Don’t worry, it’s an easy process and you can do it on your own. Once you get your hands on the replacement part, you can follow these steps to do it:
- Turn off the heater by flipping the breaker in your circuit breaker box or switching off the power outlet.
- Switch off the gas valve, and both the hot and cold water lines.
- Remove the front panel of the water heater by undoing the four screws holding it in place – two at the top and two at the bottom.
- Locate the PCB and remove the screws connected to it. Disconnect the PCB from the multi-pin connectors. Gently remove the PCB from the heater.
- Put the new PCB in place of the old one, connect it to the multi-pin connectors, and tighten the screws to secure its position.
That’s how you can replace the PCB. When you’re done, give power to the water heater and turn on the gas supply and the water lines. If the error code was created by a faulty PCB, it’ll go away at this stage.
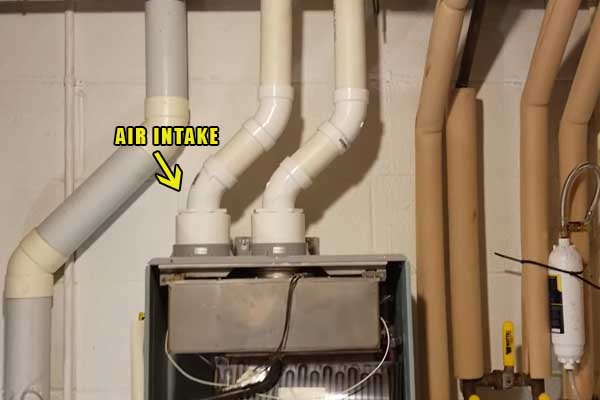
5. Blocked Air Intake
The air intake system of your heater needs to be clean and free of any debris for the heater to function properly. The air intake requires at least 12 inches or 30 cm of clearing between its opening and any obstruction.
Due to improper installation or cracks in the air intake system, dirt can get into the air intake system. The air intake filter can also get clogged and block the free flow of air.
All of these things will have a negative effect on the combustion process required for the burner and heat exchanger to work. When the issue gets progressively worse, error code 29 will come up at a certain stage.
Solution:
Inspect the air intake system and see if there’s any blockage. If you find any debris, your first job is to get it out. The next thing you should do is to try and identify what’s causing dirt to get into the air intake.
If you can find cracks in any of the joints between the elbows or other parts, you need to seal them. Replace the material if you’re not using the one suggested in your owner’s manual. Reset the water heater once you’re done so that the code disappears.
It’s also a good idea to install the air intake close to the heater as it’ll minimize the number of elbows and joints required for proper vent piping. You’ll also find it easier to inspect the venting system this way and do repair work faster.
FAQs:
How often should you check the condensate drain in your Richmond tankless water heater?
You should make it a habit to check the condensate drain once a month. It’s essential to make sure that the condensate drain is working at all times. If anything goes wrong with it, a lot of issues can occur in your water heater.
Should you install an air intake condensate trap?
Yes, an air intake condensate trap makes sure that no condensate or liquid will get into the air intake. The line of this condensate trap should be different from the one you use for your water heater.
Should you replace the water inlet filter when you clean the heat exchanger?
Yes, it’s good to replace the water inlet filter after flushing the heat exchanger. As the heat exchanger itself got blocked, the water filter is severely clogged at that point, and replacing it is the right thing to do.
How close should the air intake be to the heater?
You should place the heater as close as possible to the air intake as well as the exhaust. Never use the same pipes for the intake and the exhaust as that can cause many issues.
How often should you flush your Richmond tankless water heater?
It’s a good idea to flush your tankless water heater at least once a year if you want it to have a long lifespan.
Conclusion
How to get rid of the Richmond tankless water heater code 29? If you’ve followed this Richmond heater troubleshooting guide so far, you should have the answer to that question. You’d be dealing with a clogged neutralizer most of the time.
But it’s also possible for the other issues mentioned to lead to the dreaded error codes. Diagnose the issues one by one and when you figure out what’s causing error code 29, follow the fixes. Comment below to let us know what caused the issue in your case and how you solved it.