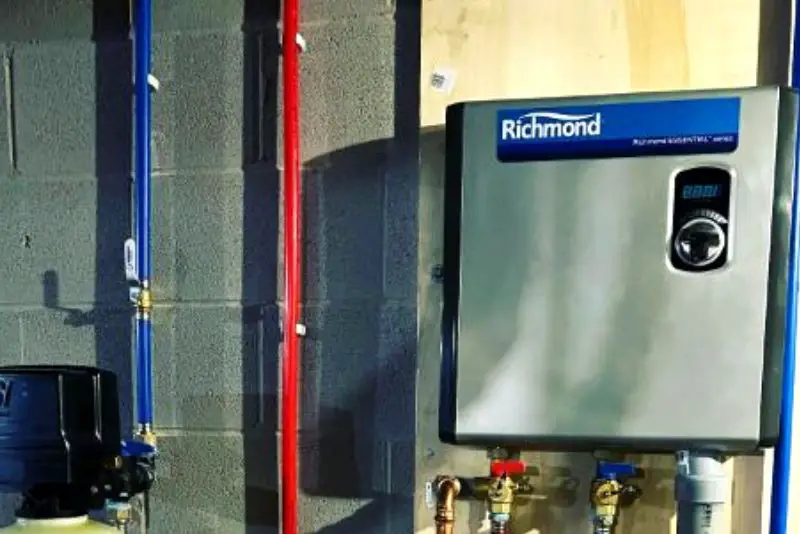
The Richmond tankless water heater code 13 refers to poor combustion. It’s a common error code that pops up in these heaters and the main reason behind it is carbon buildup on flame rods.
Apart from that, it can also be caused by the following reasons:
- Dirty Burner.
- Faulty ODS Thermocouple.
- Gas Issues.
- Improper Venting.
- Defective Blower Motor.
- Clogged Water Inlet Filter.
Keep on reading this guide to find out all about these issues in detail and learn how you can fix them. Without further ado, let’s dive in!
Richmond Tankless Water Heater Code 13 [Reasons + Solutions]
Let’s look at the main reasons behind seeing the error code 13 on your Richmond tankless water heater.
Note: You can read our ultimate guide on Richmond tankless water heater code 12 and how to fix it.
1. Carbon Build Up On Flame Rods
If you remove the front panel of your Richmond tankless water heater and take off the electronic shield, you’ll see some L-shaped 3-5 inches long rods.
These devices are called flame rods and they signal the control board to keep up the combustion process when they sense a flame from the burners.
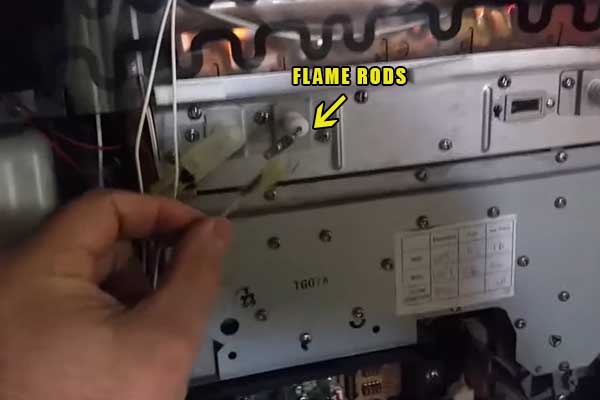
With time, carbon deposits can build up on the flame rods. When that happens, they’ll no longer be able to sense the flame from the burner and can send a signal to the control board to shut off combustion. This issue can lead to either error code 12 or 13.
Solution:
If you’re dealing with dirty flame rods, the solution is simple. You just have to take them from the heater, clean them, and put them back in. They’re connected to the circuit board. So, you should have no problem locating them.
You’ll have to unscrew the bracket that connects the flame rod to the burner assembly. Once you do that, you’d be able to pull them out. Rub them with sandpaper until you get the dirt out of them.
Feel free to use more serious cleaning solutions like rubbing alcohol or hydrogen peroxide if the deposits aren’t going away easily.
Make sure the flame rods are dry when you insert them into the heater. When you do that, the error code should go away if dirty flame rods were causing the issue.
It’s also possible for the flame rods to have been damaged if you have been using your heater for a long time. In that case, you’ll have to replace the flame rods with new ones to get rid of the error code.
2. Dirty Burner
Another common reason behind getting the error code 13 in your on-demand Richmond tankless water heater is a dirty burner.
Like most of the components in your heater that are involved in the combustion process, the burners can also be filled with soot and carbon deposits.
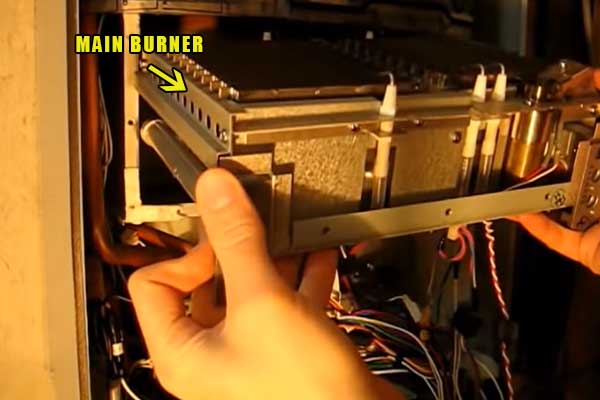
The burner can get clogged when that happens and it won’t work properly in that situation. It would lose its ability to keep up the flame in the heater and lead to error code 13.
Check whether the burner is producing a flame or not by removing the front panel of the heater and looking through the burner sight glass. If you don’t see a bright blue flame, that means your burner isn’t working.
Even though there are other issues that can make the burner fail, error code 13 increases the probability of the issue being with the burner itself.
You’ll have to remove the burner assembly from your heater and check it for dirt to know if the burner is causing the issue here.
Follow these steps to remove the burner assembly from your Richmond on-demand water heater:
Step 01 – Remove The Printed Circuit Board
- Shut off the gas supply and the power supply to the heater.
- Remove the front panel of the heater by removing the screws holding it in place.
- Unscrew the printed circuit board box from the heater and let it hang around.

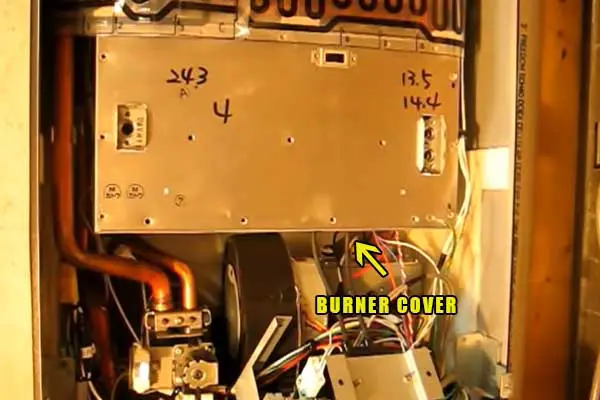
Step 02 – Remove The Burner Cover
- Remove the gas supply line clips inside your heater by undoing the screws.
- Take off the clip across the back that holds the gas pipes.
- Pull out the gas pipes from the heater. Make sure that the O-rings stay on the pipes when you pull them out.
- Remove the igniter mounting plate by taking off the screws that secure it in its position.
- Undo the screws keeping the door switch in its place and pull out the door switch.
- Remove all the remaining screws in the burner cover plate and pull off the burner cover.
- There’s a gasket on the back of the burner cover. It’ll tear a little bit when you pull it out. Make sure that you don’t tear it off as you’d want to put it back in the same condition it came out.
Step 03 – Remove The Burner
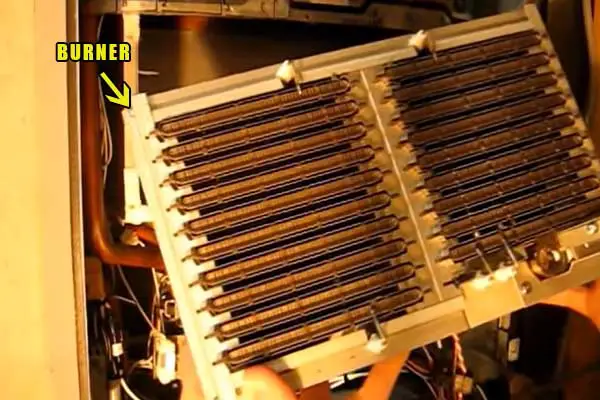
- Take out the rubber grommets.
- Remove the three screws in the back that hold the burner in its place.
- Disconnect the wires connected to the burner.
- Gently pull out the burner assembly and make sure you cause no damage to the wiring around. Take a picture if needed as it’ll help you put the burner back in the same way.
Solution:
Once you’ve removed the burner assembly, you can inspect its condition. If it’s dirty, you need to clean it. Follow these steps to clean it:
- Remove the fuel rails on both sides by undoing the two screws holding them in place.
- Clean the fuel rails by blowing compressed air into them. You can also use a thin wire and poke it through the holes to remove more dirt.
- Get rid of the dirt from the rods in the burner using sandpaper. Don’t rub too hard as you don’t want to damage them.
- Remove the ODS sensor and clean the ceramic piece inside it using compressed air. Remove the brass ring from the sensor and clean it as well.
Once you’ve cleaned the heater, you can reverse engineer the steps you took to disassemble the heater to put everything back together. You can replace the burner using the same process if it goes bad.
You should make it a habit to inspect the main burner in your heater once a year. If you find any dirt in it, clean it. You can stay on top of problems that way and remove error codes even before they have a chance to occur.
3. Faulty ODS Thermocouple
Modern heaters are equipped with many safety devices to prevent accidents. One such device is the ODS thermocouple and you can find it inside the burner assembly.
The Oxygen Depletion Sensor detects the level of oxygen and sends signals to shut off the heater if there’s too little oxygen and too much carbon monoxide. It’s designed to protect you from carbon monoxide poisoning.

As the ODS thermocouple sits inside the burner assembly, it can often malfunction due to the build-up of carbon deposits. Dirt can also get in through the air intake and that can also make it clogged up.
When it gets clogged, it’ll think that there’s less oxygen than there actually is. So, it will signal the control board to shut off the combustion process and you can end up with error code 13.
Solution:
The solution is simple – you have to clean the ODS thermocouple. If you’ve read through the section where we cleaned the burner, you know how to access this sensor and clean it.
Just follow the steps mentioned there and you’ll be good to go. If the ODS sensor is completely damaged and won’t work even after cleaning it, you have to replace it. Hopefully, doing so will get rid of the error code and your heater will operate normally again.
4. Gas-Related Issues
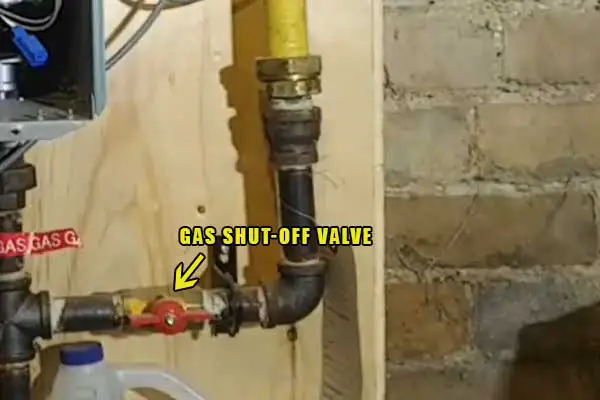
Whenever your tankless water heater is starved of gas, it won’t work properly. It’s the fuel for the heater and without it, it’s a no-go for the heater. The most common mistake behind sufficient gas not getting into the water heater is not fully opening the gas shut-off valve.
If you’re using LP to fuel your water, you may be running low on it. Besides them, low gas manifold pressure is a common issue that leads to error code 13.
Check the gas pressure using a manometer and see if it’s on par with the specifications mentioned in your owner’s manual.
Using smaller gas lines than recommended in the owner’s manual can also cause this issue. If there’s a blockage in the gas lines or you have a faulty gas valve, all of these things can cause error code 13 in your Richmond heater.
Solution:
As there are many potential gas-related issues that can pop out error code 13 in your heater, you need to diagnose the issue first and then, take corrective actions. The easiest fix is to turn the gas shut-off valve to a completely open position if you had forgotten to do it.
If you’re running low on propane, you just need to refill or replace the tank. If there are issues with the gas pressure, reach out to your local gas supplier and have them send someone to adjust it for you.
You can adjust the gas manifold pressure on your own if you know how to do it. Otherwise, get an expert.
Get the gas lines of the right size if the ones you’re using are too small. Remove all the dirt and debris inside your water heater.
If you have a faulty gas valve, it needs to be replaced. Take care of these issues as soon as you can if you want error code 13 to go away.
5. Improper Venting
Both the incoming air intake and the outgoing exhaust venting should be free of any dirt or debris for the heater to work properly.
If there’s the presence of any blockage in any of the venting pipes, it explains why you see the error code 13 coming up in your heater.

Check your owner’s manual and make sure that you’re using the right material for venting. The next step is to inspect both the inlet and exhaust venting from the inside and see if there’s any blockage in it.
Rodents, cobwebs, insects, and other dirt can get into it and cause the blockage. The air inlet filter can also get clogged up and stop air from flowing into the heater. It’s normal for the filter to get filled with dirt if you’ve been using your heater for a long period.
Solution:
If you’re not using the right material for venting as specified in the owner’s manual, you need to correct it right away. Use a vacuum cleaner to remove all the debris and obstruction you’ve found in the venting.
However, if you have a clogged air inlet filter, you have to take it out from the heater. Then, you need to clean it and rinse it thoroughly to remove all the dirt from it.
Let it dry and put it back in. Once you do all these things and make sure you have proper venting, the error code should go away.
6. Defective Blower Motor
The blower motor is an important component of the water heater as it regulates the temperature inside the heater. You’ll usually be able to hear the sound of the blower motor spinning when it works.
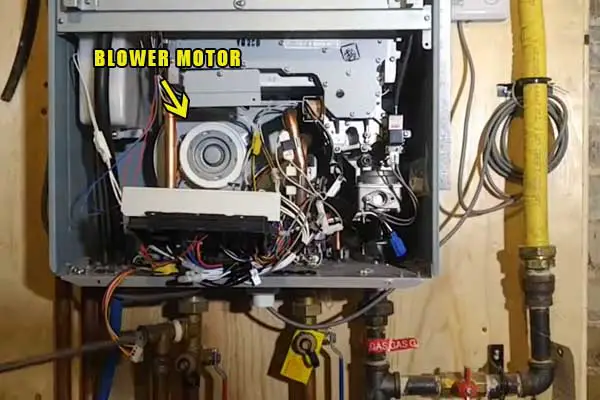
If it doesn’t work, you won’t hear the sound. The blower motor engages whenever you turn the heater on and controls the airflow in the combustion area so that the temperature doesn’t reach exceedingly high levels.
When the blower motor gets dirty, it won’t be able to move freely. As a result, the temperature inside the heater will keep going up and eventually, you’ll get the code 13 error. The same issue occurs if you have a faulty blower motor.
Solution:
You can solve this problem by cleaning the blower motor if it’s dirty. If it has gone bad, you need to replace it. You have to remove the front panel and the PCB of the heater to have access to the blower motor.
Make sure you turn off the gas supply and power supply to the heater before you work on the blower motor. After removing the control board, you can remove the blower motor from its housing by taking off the screws that secure it in its place.
Clean the blower motor as well as the blower motor housing using a vacuum cleaner or a damp rag. Don’t use a wet rag for this job. Once you’ve cleaned the area, wait for it to dry and put your heater back in its original condition.
Power the heater after a while and see if it works. If it still doesn’t work and the error code remains, it means your blower motor is damaged. In that case, you have to replace it with a new one to remove the error code.
7. Clogged Water Inlet Filter
When the water inlet filter in your heater becomes clogged, it reduces the amount of water getting into the heater. In worst cases, it can totally stop water from getting in.

The heat exchanger won’t get engaged in those cases as the flow rate of the water will either be really low or zero. It can lead to error code 11.
Solution:
The good news is that this problem is easy to fix. You just have to remove the filter from the heater, clean it, and put it back in. It’s an easy job and you can do it on your own. Follow these steps to do it:
- Turn off the power to the water heater and disconnect it from the power outlet or flip the circuit breakers to make sure that it has no electrical connection.
- Close the gas auto shut-off valve and open all the hot water faucets until you get cold water from them. Shut off the cold water inlet valve.
- Place a jar or a towel to catch the water that will be draining when you remove the water filter. Unscrew the water filter and pull it out from the heater.
- Clean the water filter with running cold water. A little water pressure should be enough to get most of the dirt out. You may need to use a Q-Tip or toothpicks for the areas that have more stubborn dirt.
That’s how you clean the water filter. Once you’re happy with how it looks, reinstall it into the water heater. The error code will go away if a dirty water filter was causing the trouble.
FAQs:
Why does my tankless water heater keep running out of hot water?
The most common reason behind hot water running out in tankless hot water is multiple faucets being used at the same time. You can install a small tank to avoid this issue so that some hot water is always ready on standby.
Is an undersized gas system a major issue when running tankless water heaters?
Yes, it can cause soot in burners which can increase the amount of carbon monoxide. It can also make the heat exchangers will be filled with condensate which will lead to corrosion and make it go bad faster.
What does error code 88 mean in Richmond tankless water heaters?
Error code 88 comes up when your heater has reached a certain number of hours of combustion. It’s signaling that you should do some maintenance work including flushing the heat exchanger and replacing the water filter.
How often should you clean the water inlet filter?
If you look at your owner’s manual, it’s recommended that you clean it once a month. But in practice, it depends on the condition of your water and how often the filter gets clogged up. You should clean the water filter at least once a year.
Conclusion
How to get rid of the Richmond tankless water heater code 13? Now you should all about it after completing this guide. There are many potential reasons behind it but more often than not, the culprit will be carbon deposits on the flame rods. You can clean them to solve the issue.
However, if it’s not that, you need to diagnose and determine the real cause of why the error code 13 is coming up in your heater. Once you do that, follow the fixes mentioned and that will take care of the issue. Comment below what was causing the error code in your case and how you removed it.
