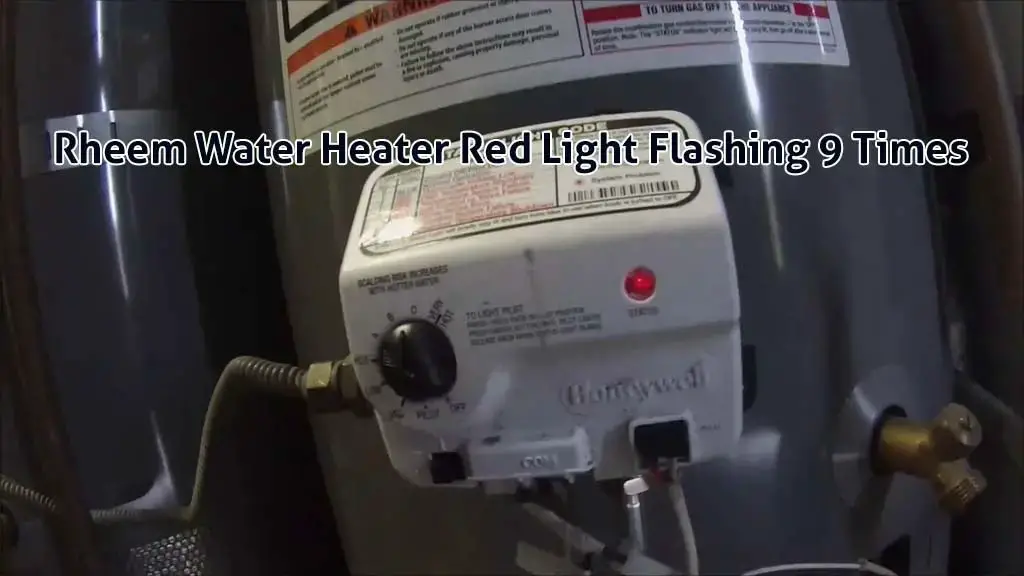
The number one reason behind a Rheem water heater red light flashing 9 times is a failed chamber sensor. It’s a safety device that signals the heater to shut off when the temperature inside the combustion chamber becomes too hot.
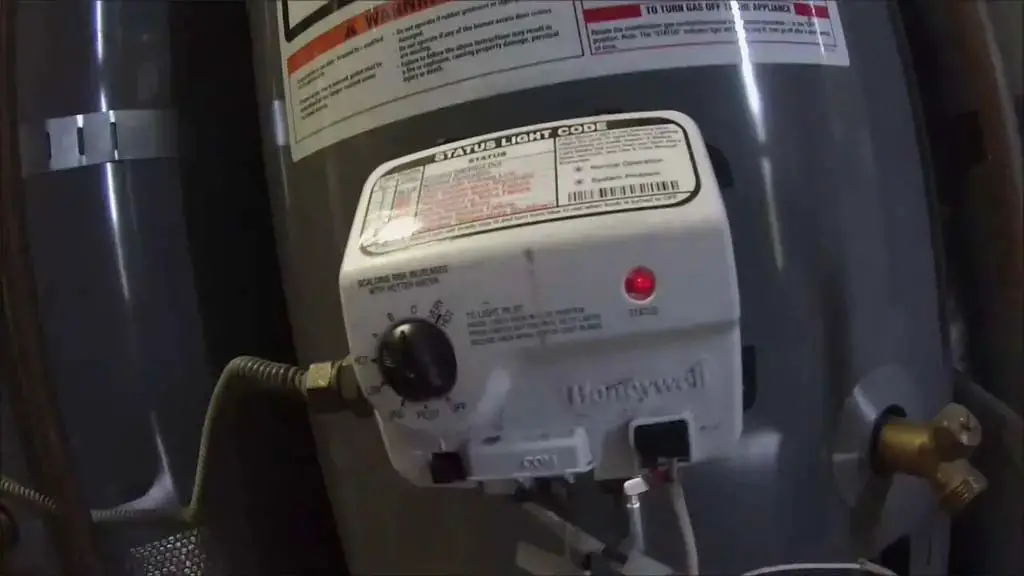
Apart from that, the reasons behind this error code could be:
- Combustion chamber problems.
- Irregular gas supply.
- Circuit board malfunction.
- Some other issues.
I’ll talk about all the reasons and their solutions in detail in this guide. So, without further ado, let’s dive in!
Rheem Water Heater Red Light Flashing 9 Times [Fixed A-Z]
We’ll address all the possible reasons along with their solutions behind your Rheem water heater’s 9 red flashes problem in this section.
1. Chamber Sensor Failure
If your Rheem water heater is flashing 9 times, a faulty chamber sensor is one of the first things I would suspect. The chamber sensor is a small safety device mounted near the combustion chamber. It’s the sealed compartment where the gas burner creates the flame that heats your water.
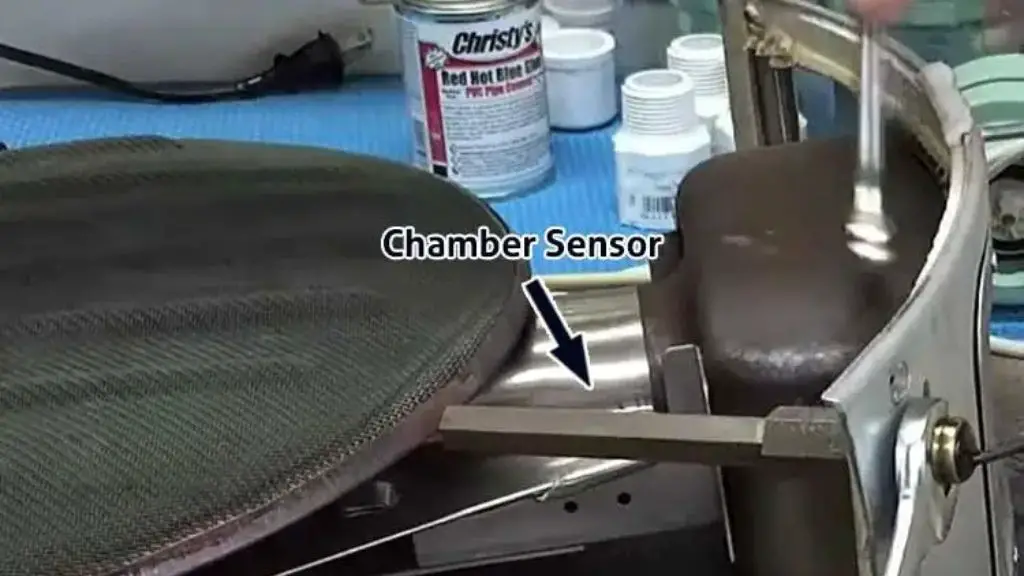
The main job of the chamber sensor is to monitor the conditions inside that chamber. Whenever the combustion chamber gets hotter than it’s supposed to or detects an unsafe condition, the chamber sensor signals the gas control valve to shut off the gas supply.
The burner goes out immediately, preventing the water heater from continuing to operate under potentially unsafe conditions. Think of it like the smoke detector in your home. You don’t notice it’s there when everything is normal. But the moment it thinks something is wrong, it reacts immediately.
Unlike a cracked burner or a leaking tank, a bad chamber sensor often looks perfectly normal. It may be clean, undamaged, and show no visible signs of failure. Internally, however, it can begin sending incorrect readings to the control board.
When that happens, the control board assumes there’s a safety issue inside the combustion chamber and immediately shuts the burner down. Instead of allowing the heater to keep running, it locks the unit out and displays the 9-flash error code.
The burner may have been working perfectly a few minutes earlier. The flame may even look completely normal during ignition. Then suddenly the water heater shuts itself down and starts flashing 9 times. More often than not, it’s caused by the Rheem water heater chamber sensor failure.
The chamber sensor doesn’t necessarily fail the instant the burner lights. It can trip after the heater has been running for a short time, causing the control board to stop the heating cycle as a precaution.
Solution:
If the chamber sensor has failed, replacing it is usually the fix. If your unit is still under warranty, you can order the replacement part from Rheem. Whether you do the replacement job yourself or hire a plumber is up to you.
But I’ll show you how you can complete the Rheem water heater chamber sensor replacement job on your own. I’ve broken it down to three easy steps that anyone can follow.
How to Replace a Rheem Chamber Sensor?
Replacing the chamber sensor isn’t a particularly difficult repair, but it does require partially disassembling the burner assembly to access it. If you’ve worked on gas appliances before and are comfortable shutting off the gas supply, it’s a fairly manageable job.
Once you have the correct replacement chamber sensor, the installation itself can be broken down into three simple steps.
Step 1 – Access The Burner Assembly
Start by turning the gas control valve to OFF and shutting off the gas supply to the water heater. If your model uses electrical power, unplug it or switch off the circuit breaker as well.
Next, remove the lower burner access cover on the front of the water heater. This gives you access to the sealed combustion chamber. From here, disconnect the burner assembly.
Depending on your Rheem model, you’ll typically disconnect the burner tube, pilot tube, ignition wire, and any sensor wiring connected to the gas control valve before removing the entire burner assembly.
Take your time during this step. Many of these connections are fairly small, and forcing them can easily damage a fitting or connector. Once everything is disconnected, carefully slide the burner assembly out of the combustion chamber.
Step 2 – Replace The Chamber Sensor
With the burner assembly on a work surface, locate the chamber sensor. It’s a relatively small component mounted near the combustion chamber and connected by a wire back to the control system.
Disconnect the old sensor and remove it from its mounting location. Even if the old sensor looks perfectly clean, don’t assume it’s still working. One of the frustrating things about chamber sensors is that they often fail internally without showing any visible signs of damage.
Install the new chamber sensor in exactly the same position as the original one. Pay attention to the wire routing while doing this. Route the wiring exactly as it was from the factory and make sure it’s fully secured away from the burner flame and other hot surfaces.
Once the new sensor is installed, slide the burner assembly back into the combustion chamber and reconnect every tube, wire, and fitting you removed earlier.
Before moving on, double-check every connection. A loose ignition wire or improperly seated burner assembly can create a completely different problem that wasn’t there before.
Step 3 – Restart the Water Heater
Turn the gas supply back on and restore power to the water heater. Now restart the unit and let it go through a complete ignition cycle. The pilot should light normally, the main burner should ignite, and the water heater should continue running without dropping back into a 9-flash fault.
Don’t stop testing after the first successful ignition. A chamber sensor can sometimes trigger the fault after the heater has been running for a while, so I like to let the unit complete a full heating cycle and then check on it again later.
Even better, monitor it over the next 24 to 48 hours. If the water heater continues heating normally and the 9-flash error never returns, you’ve likely solved the problem.
If the fault comes back even after installing a new chamber sensor, it’s time to start looking beyond the sensor itself. At that point, the problem could be related to the combustion chamber, gas pressure, the chamber seal, or another component within the water heater’s safety system.
2. Combustion Chamber Issues
Sometimes, the chamber sensor isn’t actually the problem. Instead, it’s doing exactly what it was designed to do by warning you about a problem inside the combustion chamber itself.
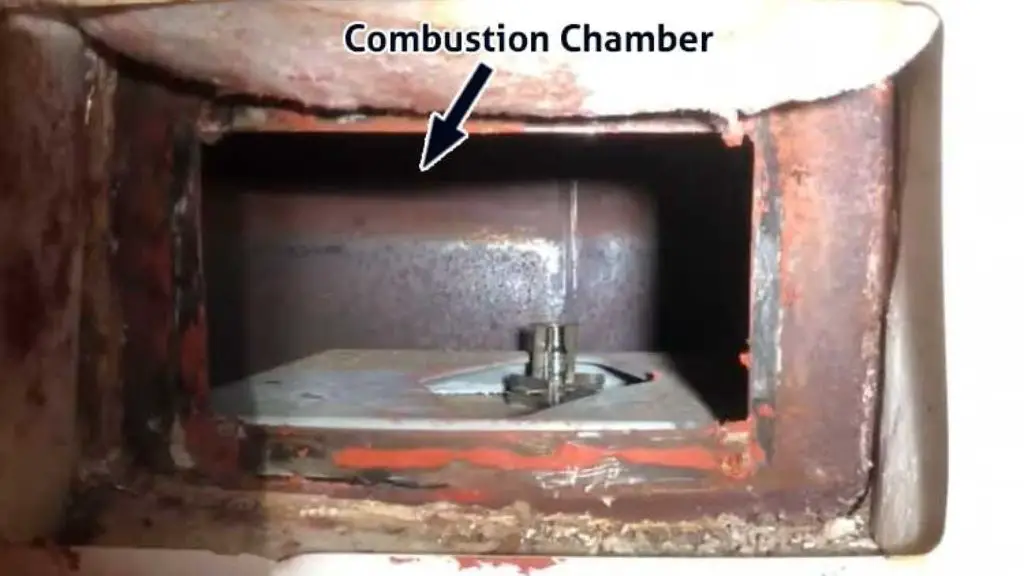
The combustion chamber is the sealed compartment where the gas burner produces the flame. It’s designed to contain the flame, control airflow, and safely direct combustion gases toward the vent.
If something inside this chamber isn’t operating the way it should, the chamber sensor will detect the abnormal condition and shut the water heater down. One possibility is an overheating combustion chamber.
If the chamber gets hotter than the sensor’s safe operating limit, the sensor immediately signals the gas control valve to stop supplying gas. The burner shuts off and causes the Rheem water heater blinking red 9 times as a result.
In this case, the chamber sensor is simply reacting to an unsafe condition rather than causing it.
Another possibility is a damaged combustion chamber seal. The burner chamber on a Rheem water heater is designed to remain sealed during operation.
If that seal becomes damaged, worn out, or doesn’t seat properly after servicing, the chamber sensor may detect abnormal combustion conditions and trigger the same fault code. This is why simply replacing the chamber sensor doesn’t always solve the problem.
If the underlying issue is excessive heat or a combustion chamber that’s no longer sealing correctly, a brand-new sensor will eventually detect the same unsafe condition and shut the water heater down again.
A lot of homeowners fall into the trap of replacing parts one after another without addressing what’s actually causing the chamber sensor to trip. The result is a water heater that works for a short time before they see the Rheem red light blinking 9 times again.
Solution:
If you’ve already replaced the chamber sensor and the error returns, it’s time to shift your attention to the combustion chamber itself. Start by removing the burner assembly and inspecting the combustion chamber carefully.
Look for anything that appears out of place, including a damaged chamber seal, warped components, excessive soot, or signs that the burner isn’t sitting correctly inside the chamber.
While you have the burner assembly out, inspect the burner and surrounding components for debris that could affect combustion. Even if nothing immediately stands out, make sure everything is clean and properly reinstalled before putting the water heater back into service.
Once everything has been reassembled, restart the water heater and let it complete a full heating cycle. If the unit continues operating normally over the next day or two without returning to the code, you’ve likely corrected the underlying combustion chamber issue.
However, if the chamber appears to be in good condition and the fault still returns, you need to keep on diagnosing.
3. Gas Supply Issues
Although it doesn’t get talked about nearly as often as a bad chamber sensor, gas supply problems can also trigger a Honeywell water heater 9-flashes code. At first, this doesn’t seem to make much sense.
After all, what does gas pressure have to do with a chamber sensor? Quite a lot, actually. Remember, the chamber sensor isn’t just monitoring itself. Its job is to monitor the conditions inside the combustion chamber.
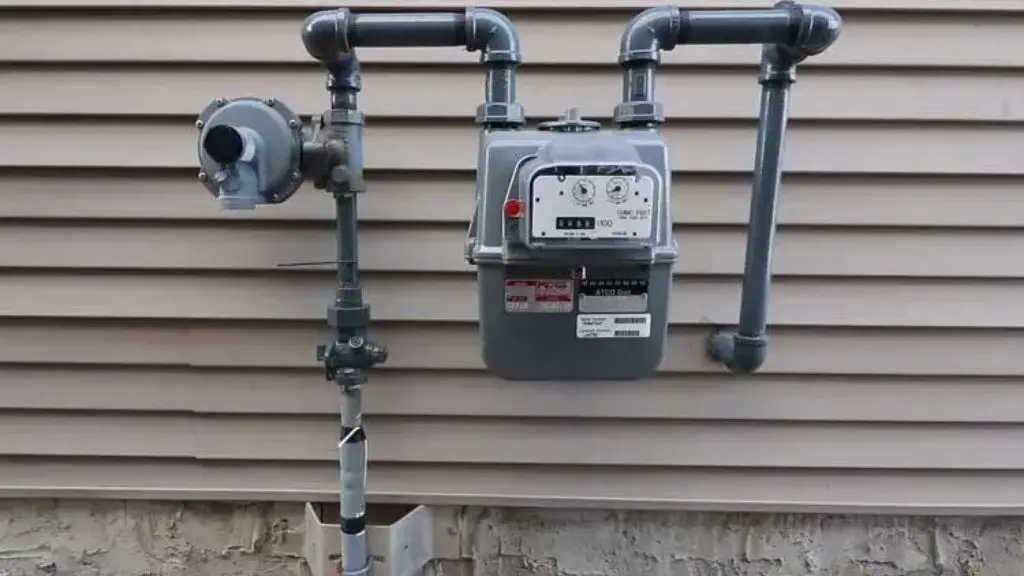
For the burner to operate correctly, it needs the proper amount of gas. If the incoming gas pressure is too low, the flame can become weak or unstable. If it’s too high, the flame can burn differently than it was designed to. Either way, combustion inside the chamber is no longer normal.
Once the chamber sensor detects these abnormal conditions, it does exactly what it was designed to do. It signals the gas control valve to shut off the burner, and the control board stores the 9-flash fault code.
This is why replacing the chamber sensor doesn’t always solve the problem. I came across one case where a homeowner had already replaced both the chamber sensor and the gas control valve. But still, the water heater continued displaying a 9-flash error.
Eventually, I stopped focusing on the water heater itself and started looking at the home’s gas supply instead. That’s when I found the problem. It turned out the issue wasn’t a defective water heater component at all.
The gas pressure needed to be checked because the home had a regulator installed on the gas line. The regulator or gas pressure was causing abnormal combustion, which in turn kept triggering the chamber safety system.
Solution:
To know if this is the case with you, you have to verify the gas supply pressure. The best way to do this is to use a device called a manometer to measure it. Ask a professional to do this, and you’ll have your answer soon.
The measured pressure should then be compared against Rheem’s specifications for your particular model. If your home has a gas pressure regulator installed, have that inspected as well.
Regulators can fail, become misadjusted, or restrict gas flow, all of which can affect combustion inside the water heater. While you’re at it, inspect the rest of the gas supply for anything that could restrict flow, such as a partially closed shutoff valve or a damaged gas line.
Once the gas pressure has been corrected, restart the water heater and allow it to complete several heating cycles. If the combustion chamber is now operating under normal conditions, the chamber sensor should stop tripping, and the error should no longer appear.
4. Failed Circuit Board
The control board is essentially the brain of the water heater. Every major component reports back to it. It monitors the chamber sensor, controls the ignition sequence, communicates with the gas valve, and decides whether it’s safe for the burner to continue operating.
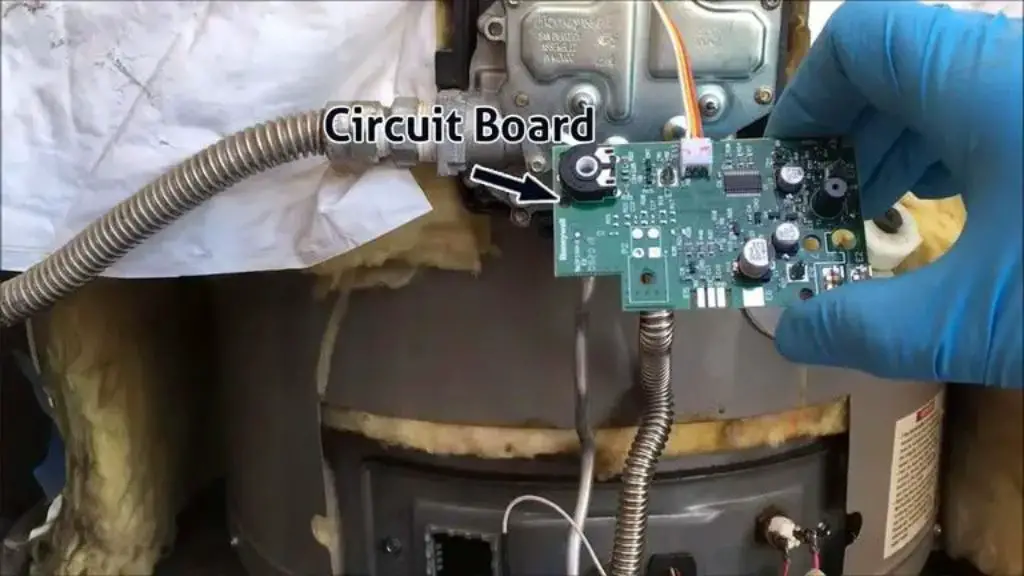
If the control board begins malfunctioning, it can misinterpret the signals it’s receiving from the chamber sensor. In other words, the chamber sensor may be working perfectly, but the control board incorrectly believes there’s a problem inside the combustion chamber.
The end result is exactly the same. The control board shuts off the burner and displays the 9-flash error code. This is one reason I don’t recommend replacing parts blindly.
It’s a good reminder that fault codes don’t always point directly to the failed component. Sometimes they simply tell you which safety system has been activated.
Solution:
Before replacing the control board, make sure you’ve already ruled out the more common causes, particularly a faulty chamber sensor and combustion-related issues. If those components have been inspected or replaced and the error code still returns, it’s worth testing the control board.
Start by inspecting all of the wiring connected to the board. Look for loose connectors, damaged wires, or signs of corrosion that could interfere with communication between the chamber sensor and the control board.
If the wiring looks good and the chamber sensor has already been ruled out, replacing the control board is usually the next step. The control board in these Rheem water heaters is located inside the gas control valves. So, you’ll have to unscrew it first and get inside it to get access to the control board.
Fortunately, this is typically a straightforward repair. Disconnect power to the water heater, remove the old control board, transfer each wire to the corresponding terminal on the new board, and reinstall everything according to the manufacturer’s instructions.
Once the replacement is complete, restore power and allow the water heater to run through several complete heating cycles. If the control board was the source of the problem, the burner should operate normally, and the error code should go away soon.
5. Other Issues
Although the above points cause more than 90% of Rheem 9-flash errors I’ve seen, there are still a few less common issues worth checking. These include:
- A dirty or faulty flame sensor.
- Ignition problems.
- Venting issues.
Let’s quickly go over each one.
A dirty or faulty flame sensor can also create confusing symptoms. The flame sensor’s job is to verify that the burner flame is actually present.
If it becomes coated with carbon or corrosion, it may fail to detect the flame even though the burner has successfully ignited. The control system may then shut the burner down as a safety precaution.
Ignition problems are another possibility. A weak igniter, damaged ignition wire, or intermittent spark can prevent the burner from establishing a stable flame. In some situations, this can cause repeated failed ignition attempts before the control system eventually locks the water heater out.
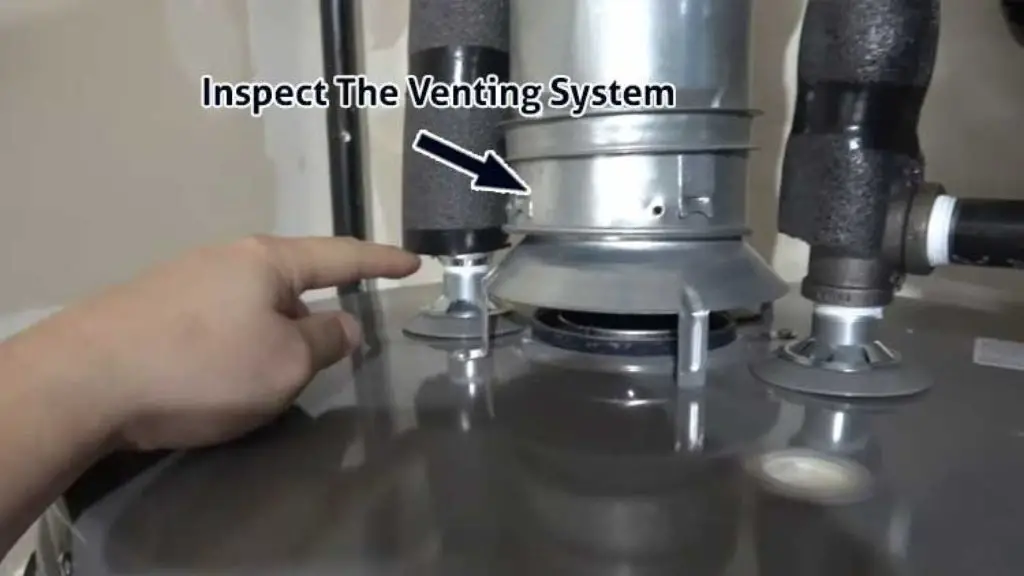
Finally, venting problems can affect combustion inside the burner chamber. A partially blocked vent or poor exhaust flow can change how the burner operates, creating combustion conditions that eventually trigger the chamber safety system.
Solution:
The fix depends entirely on which of these problems is causing the fault. For a dirty flame sensor, remove the sensor and clean it gently using fine steel wool or a Scotch-Brite pad. If cleaning doesn’t restore normal operation or the sensor is physically damaged, replace it with a new one.
If you’re dealing with ignition problems, inspect the igniter, ignition wire, and spark electrode. Look for cracks, damaged insulation, loose connections, or a weak spark. Replace any defective ignition components before testing the water heater again.
For venting issues, inspect the entire vent system for obstructions, disconnected sections, bird nests, or anything else restricting exhaust flow. Once the vent is clear and properly installed, restart the water heater and allow it to complete several heating cycles.
None of these problems are as common as a failed chamber sensor or incorrect gas pressure. However, if you’ve already ruled out the more likely causes, they’re definitely worth investigating before replacing more expensive parts.
Once you go through all of these steps, I believe you’ll no longer have to think about why my water heater is blinking red. Take it easy and good luck with the repairs. If the problem still persists even after you’ve tried all these things, you must consult a technician.
FAQs
Can I continue using my water heater if it’s flashing 9 times?
I wouldn’t recommend it. The 9-flash code indicates the water heater has detected a safety-related issue, so it’s best to diagnose and repair the problem before putting it back into regular use.
Is a Rheem chamber sensor bypass a good idea?
Absolutely not. The chamber sensor is a critical safety device that protects against unsafe combustion conditions. Bypassing it can create a serious safety hazard and should never be attempted.
How much does it cost to replace a Rheem chamber sensor?
The chamber sensor itself is usually inexpensive compared to other water heater components. The total cost depends on whether you replace it yourself or hire a plumber for the repair.
Where can I find all the rheem water heater blinking red light codes?
Rheem includes the flash code chart in the owner’s manual for each model. You can also find it on the manufacturer’s website by searching your water heater’s model number.
Conclusion
There, you have it. Now, you know all possible reasons behind a Rheem water heater red light flashing 9 times. The good thing is that you also know the fixes for each of these problems.
In most cases, you’ll be good to go after replacing the chamber sensor. But if that doesn’t work, you know how to diagnose it systematically. If you’re struggling with the right thermostat settings on your heater, I also have a guide on it. Check it out!