It can be extremely frustrating when you release the pilot button and your heater won’t work. If you’ve done some research, you’d know that a bad thermocouple is most likely the culprit in such situations. So, how do you fix the Mr. Heater thermocouple bypass for good?
Thankfully, it’s a pretty easy process, regardless of which type of Mr. Heater you use. I’ll walk you through how you can do it and also talk to you about the safety risks you’ll be taking if you do that.
I’ve also shared how you can replace the thermocouple because I think that’s a better long-term solution. So, let’s dive in!
Mr. Heater Thermocouple Bypass [Full Process Explained]
The thermocouple is a very important safety device in your Mr. Heater propane heater. It detects whether the pilot is lit properly by sensing the flame. If it doesn’t notice that the pilot is lit, it’ll prevent the heater from turning on.
That’s because if the pilot isn’t lit, there’s the possibility of a gas leak, and that could lead to an accident. I say this to make sure you know what you’re getting into if you’re looking to bypass the thermocouple.
It’s a very important safety device to prevent accidents. So, it’s a good idea to use it as a temporary thermocouple fix and then move on to a more permanent solution. With that said, let’s look at how you can do it:
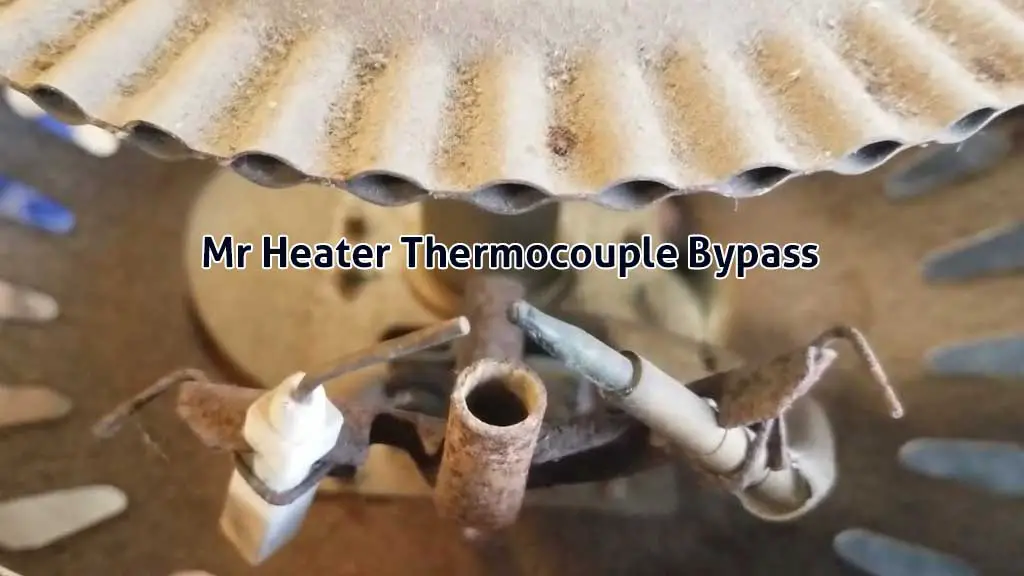
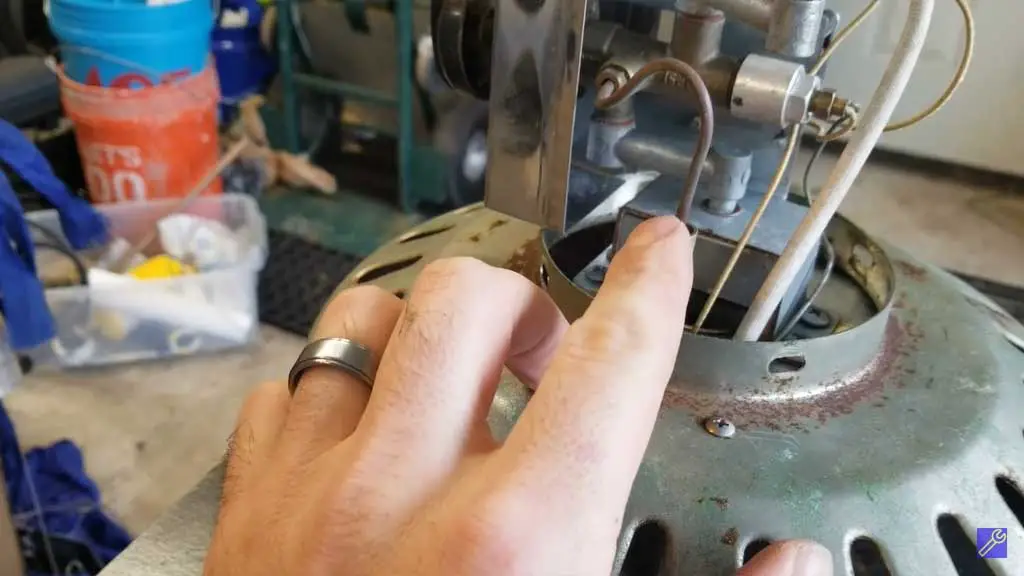
You have to pull out the cover of the heater to access everything inside it. Then, you’ll have to locate the thermocouple. The location of the thermocouple varies depending on the model.
But it’s located right next to the pilot light. So, knowing that should narrow down your search for where the thermocouple is. It’s easy to locate it if you know what to look for. Here’s a picture to help you out and give you an idea of what the thermocouple looks like:

Now, you need to follow the thermocouple wiring to the control valve. To bypass the thermocouple, you won’t have to do anything to it. It’s the control valve that you need to adjust. Why is that?
That’s because the thermocouple produces a small amount of electricity and affects the control valve. Now, what you need to do depends on the type of heater you have. There are tank-top heaters, portable heaters, and so on. Here’s how I did it in my Mr. Heater tank-top heater, along with a picture of what the control valve looks like:
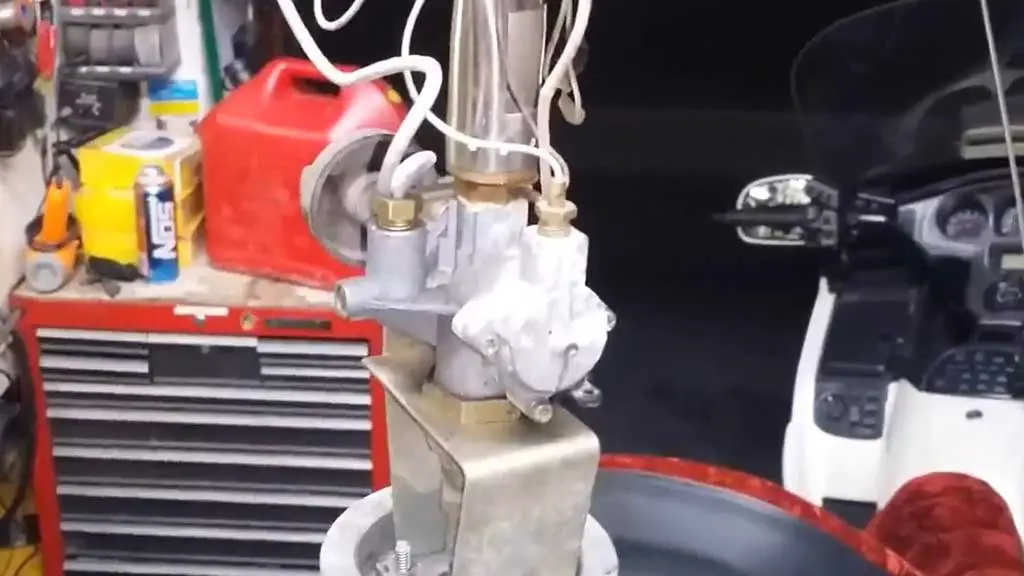
There’s an electromagnet inside the control valve that gets activated when the thermocouple is on. That’s what you need to adjust so that your heater isn’t affected if the thermocouple is on or off.
Now, remove the outer screw of the control valve and look at the part at the back. It’ll have a clip that you have to remove. Then, you have to remove the part that comes out with it along with the spring. Take your time to keep an open connection to the tilt switch.
You can then attach the control valve screw back again, and that’ll bypass the thermocouple. Make sure that no gas is leaking from it when you put the screw back on and that there’s a tight connection.
Even with the other types of Mr. Heater propane heaters, the basic principle remains the same. You’ll have to look inside the control valve and locate the part that has a spring. That’s the electromagnetic part that relies on the thermocouple. Once you remove it, the thermocouple will be bypassed.
How To Clean The Mr. Heater Thermocouple
I can understand why it can be so tempting to bypass the thermocouple. As your heater gets older, it may take longer to start. Waiting for the pilot light to turn on and kickstart the thermocouple can take a few minutes. So, the desire to bypass the thermocouple is natural, and I’ve been there before.
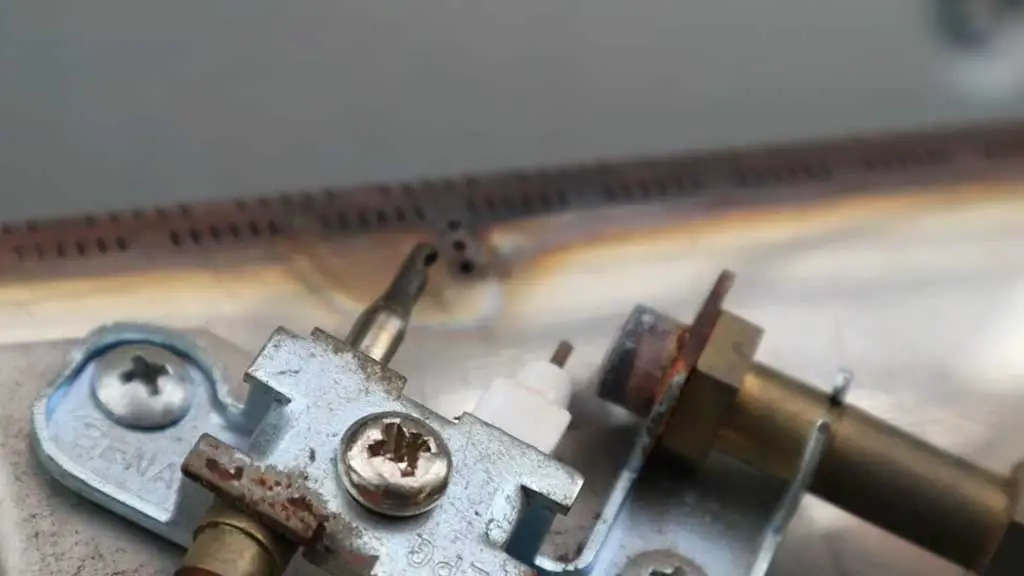
However, you need to consider that maybe it’s happening due to the fact that there’s a lot of dirt on the thermocouple. Over time, soot and carbon deposits can settle on the thermocouple and keep it from performing effectively. So, giving it a thorough cleaning can solve the issue. Here’s how you do it:
Make sure that the gas connection is off, as you don’t want any accidents while cleaning it. Then, remove the cover of the heater so that you can access the thermocouple. I start by vacuuming the area around the thermocouple to get all the loose pieces of dirt out.
Depending on what kind of access you have to your thermocouple, further steps can vary. If you have the wiggle room to move your hands easily around the thermocouple, you can start cleaning it right away.
I recommend using fine-grit sandpaper or an emery cloth to clean it and get the dirt out. However, if you don’t have good access to it, remove the screw that holds the thermocouple and clean it.
Once you’re done, attach the screw back on and secure the thermocouple in its place. Give it a final vacuum to complete the cleaning job, and put the cover of the heater back on. Hopefully, your heater will run a whole lot smoother once you’ve cleaned it.
How To Replace The Mr. Heater Thermocouple
If your heater doesn’t stay lit after you release the knob, there’s a strong possibility that something is wrong with the thermocouple. When the issue is the thermocouple, it could either be dirty, not in the right position, or it could be malfunctioning.
I’ve already talked about how you can clean it. When you do that, take a look at the position of the thermocouple. If it sits too far from the pilot light, it won’t be heated, and therefore, the heater won’t come on. In that case, you need to do a Mr. Heater thermocouple adjustment by manipulating the wiring and the holder of the thermocouple.
If cleaning or adjusting the position of the thermocouple doesn’t solve the Mr. Heater Thermocouple problem, your only option is to replace it. Again, the process of replacing it isn’t too different from cleaning it.
Instead of putting the same thermocouple back on when you clean it, you’ll have to put a new one in place of the old one. Then, secure it in place by fastening the screw, and that’ll complete the replacement process.
I hope replacing it will fix the Mr. Heater thermocouple issue. If the heater doesn’t work even after the Mr. Heater thermocouple replacement, there may be other problems with your heater. In that case, I recommend getting in touch with an expert to find out the right solution.
How To: Patio Heater Thermocouple Cleaning
Even if you’re using a patio heater, the process of cleaning the thermocouple is the same. The outer cover of the patio heater is usually held in place by four screws. So, you’ll have to remove them to be able to take off the cover and access the thermocouple.
Once you take off the cover, proceed with caution when dealing with the heater. That’s because the edges of the heater are sharp, you can get cut if you’re not careful.
You can remove the top part from the heater with the thermocouple in place. Then, take sandpaper or emery cloth and use it to clean the thermocouple. After you clean it, put everything back in place, and you’re done.
FAQs:
What is the Mr. Heater thermocouple replacement cost?
The part itself is pretty inexpensive, and you can easily find it for $10-$15 or maybe even less. And that’s the only cost required if you can replace it yourself. Otherwise, you’d have to consider labor charges.
What should the pilot look like when it’s lit?
First of all, the color of the pilot should be blue and not yellow. The size of the flame of the pilot should go beyond the thermocouple. If it barely touches the thermocouple, something is wrong. To fix such issues, you can check the solution guide on Mr heater flame problem.
Why does my Mr. Heater ignite button not work when I press the button?
There are a few potential reasons behind it. The spark electrode could be broken, or the igniter wire may not be attached. The igniter wire may be damaged or defective.
Why does my Mr. Heater keep shutting off?
The most likely reason behind it is that the pilot is blocked. Cleaning it will do the trick. On top of that, make sure that there is at least 9 square inches of free space around the heater.
Conclusion
If you want to know how to do a Mr. Heater thermocouple bypass, you have all the answers by now. However, do so after you fully understand the safety risks that you may be taking if you do so.
Rather than bypassing the thermocouple, I suggest that you replace the thermocouple if it’s faulty. I’ve also shared the steps that will help you do that. When nothing is working, getting a new Mr heater is the wise decision.